The following article describes how to use and manage Microsoft 365 services.
First, go to your trademark control panel, MAGIC or NUXIT.
Microsoft 365 management dashboard
Within the panel Dashboard, go to MICROSOFT 365.
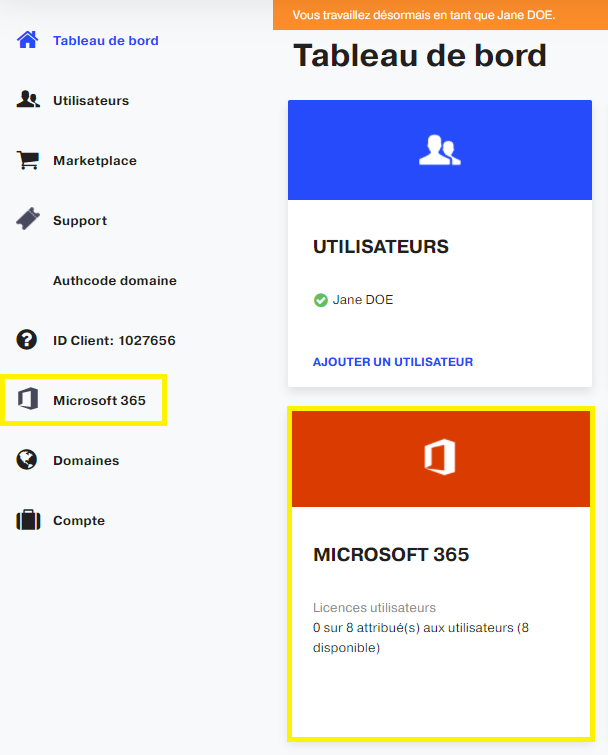
Your panel displays all Microsoft 365 management options.

Assign my domain to Microsoft 365
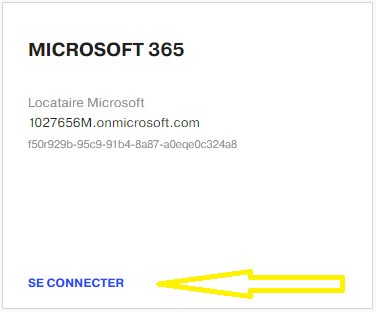
Connect to Microsoft 365
Still on your panel dashboard > left menu Microsoft 365 > LOG IN link viewed at the very first section.

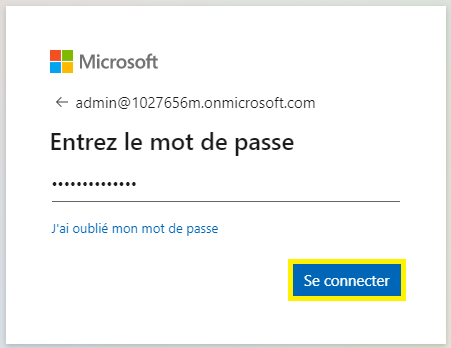
You will be redirected to the official Microsoft login link https://login.microsoftonline.com/. Note down the ‘Microsoft Tenant’ admin@1027656M.onmicrosoft.com in our example. Click finally the Following button.

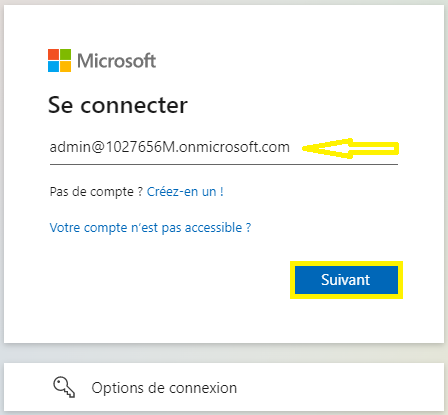
Enter password and click To log in button.

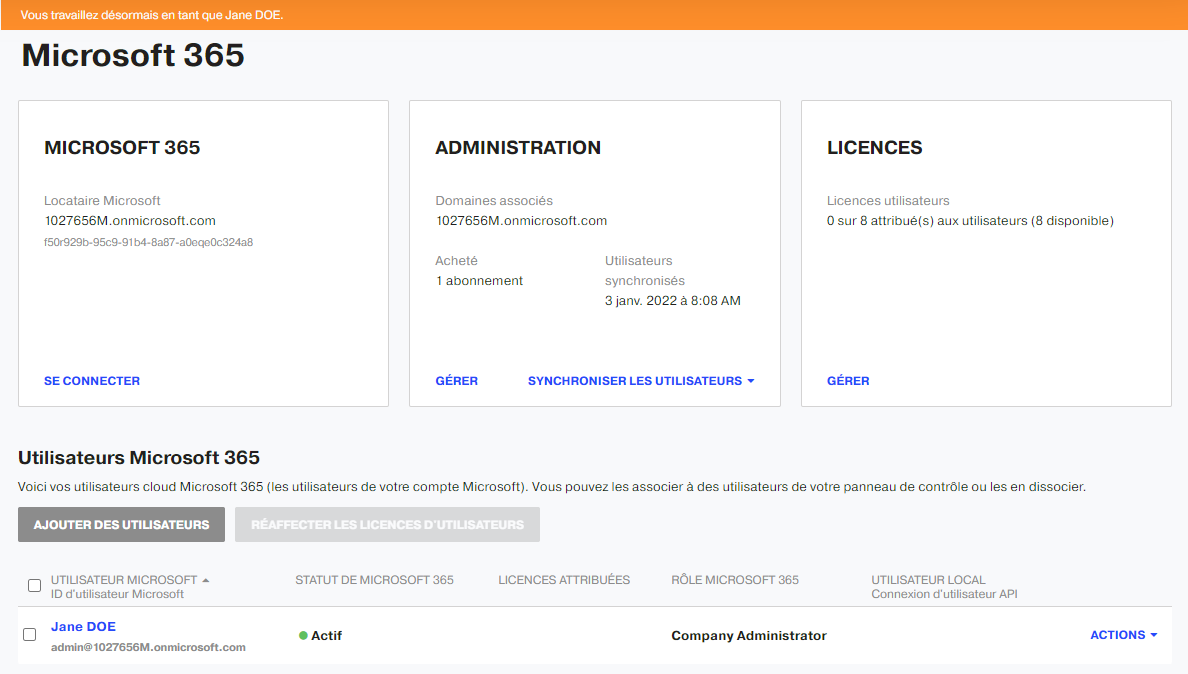
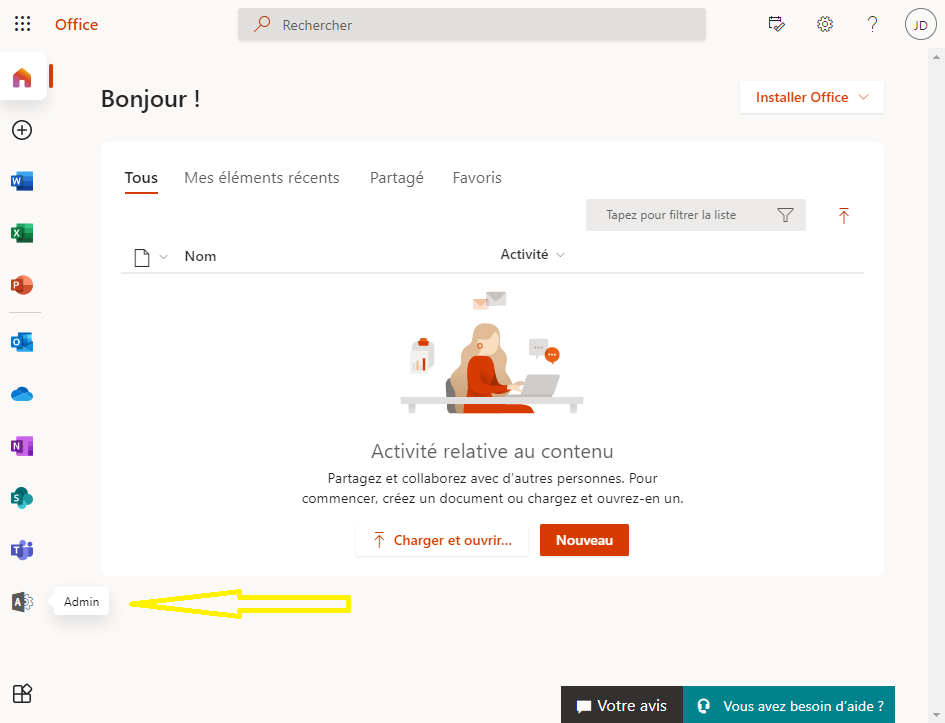
Microsoft 365 Admin Panel
Microsoft panel displays its several options. Click the Admin little icon.

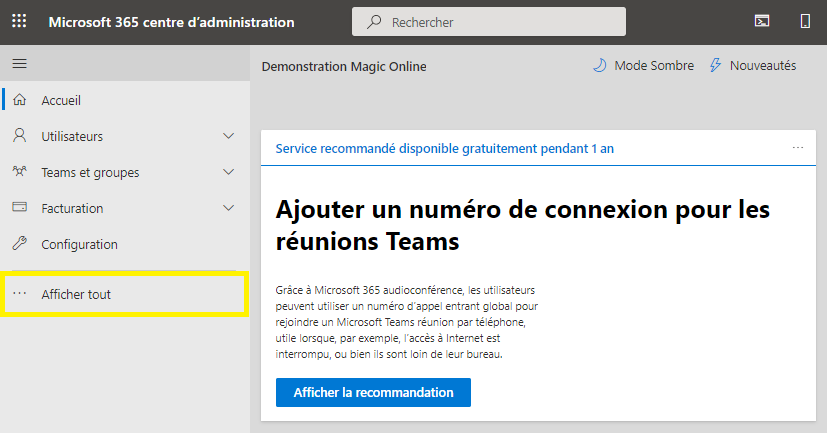
Follow Show all on the left side menu.

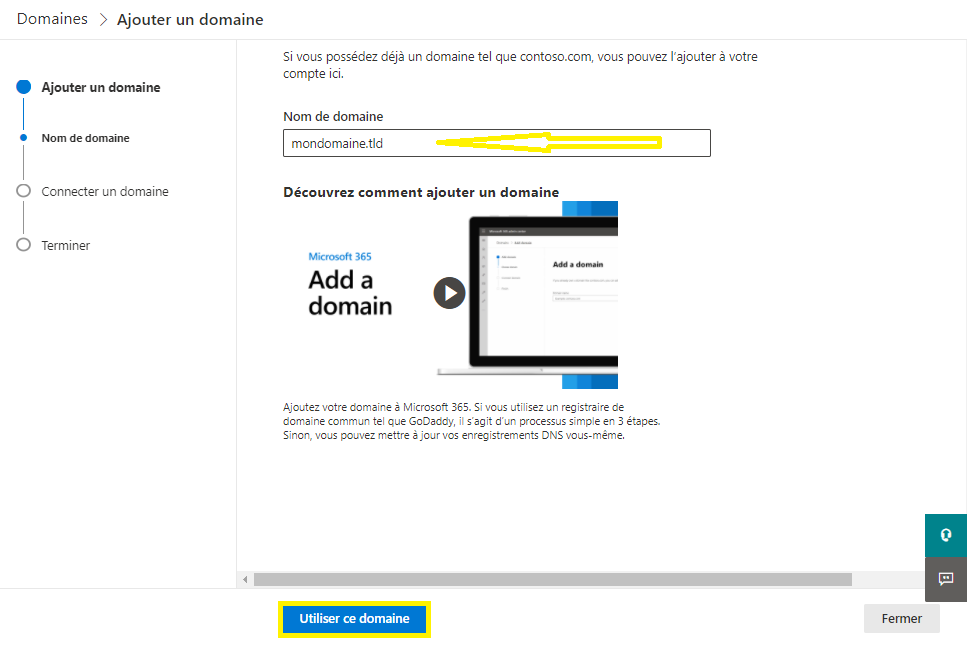
Add my domain
Go to Settings > Domains then Add Domain.

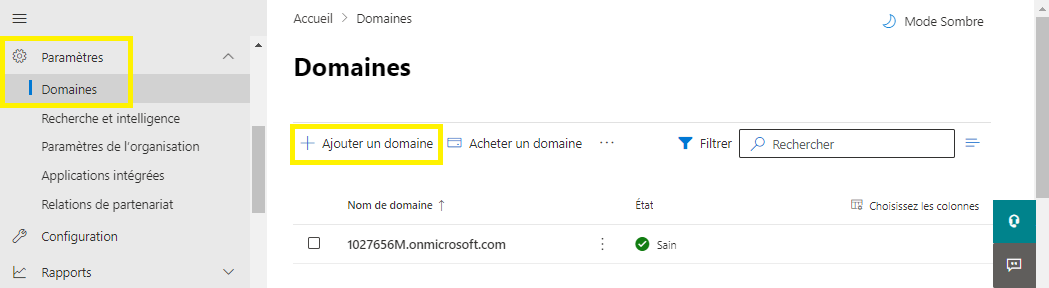
Add your domain and click Use this domain button.

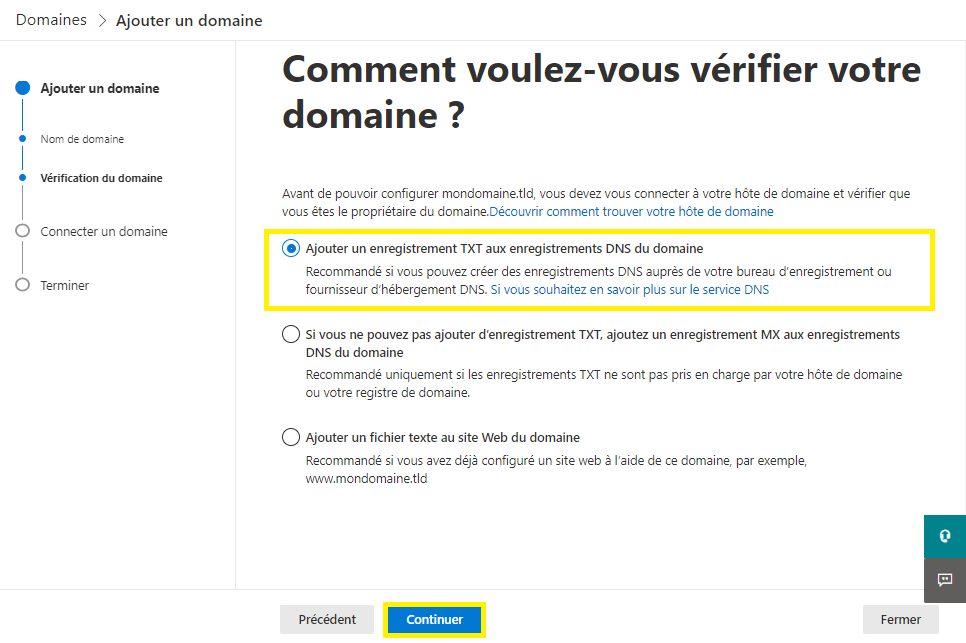
Verify added domain
Tick the method to use. We chose the TXT record. Click Continue.

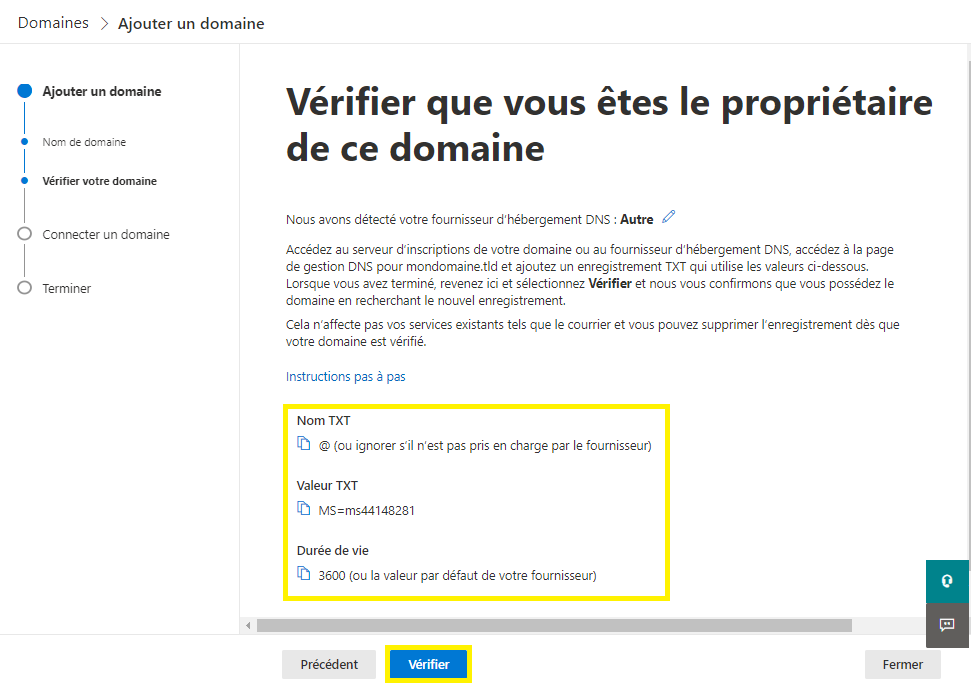
MX record will be displayed : TXT value: MS=msXXXXXXXX
Select and add this record to your domain's DNS. It can take up to 30 minutes to verify after you've added the record. Click Verify button.

The following error is displayed when DNS changes did not take effect yet :


Typically it takes about 30 minutes for DNS changes to take effect. However, it can occasionally take longer for a change you've made to update across the Internet's DNS system. Click Try again.
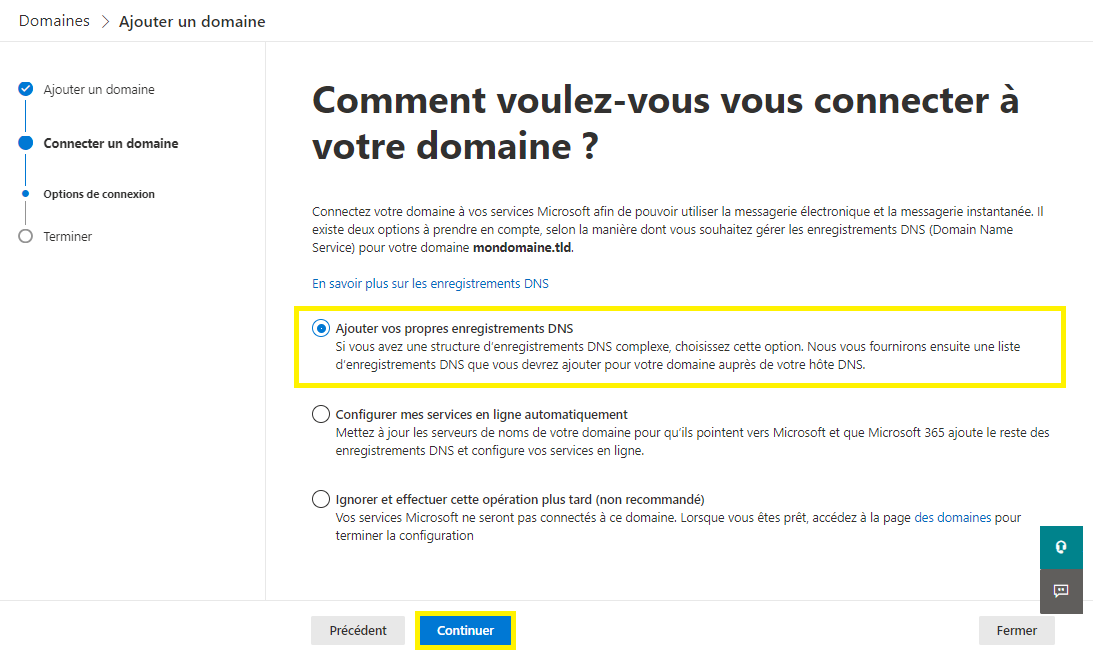
Connect my domain
Select More options to connect your domain.

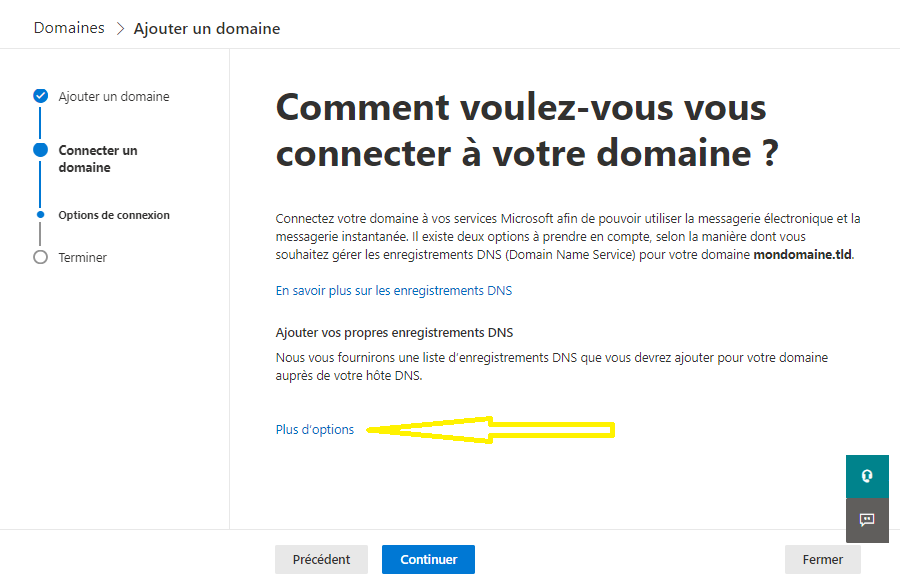
In this example we chose Add your own DNS records.
Click Continue.

Tick Exchange and Exchange Online Protection if you want to.

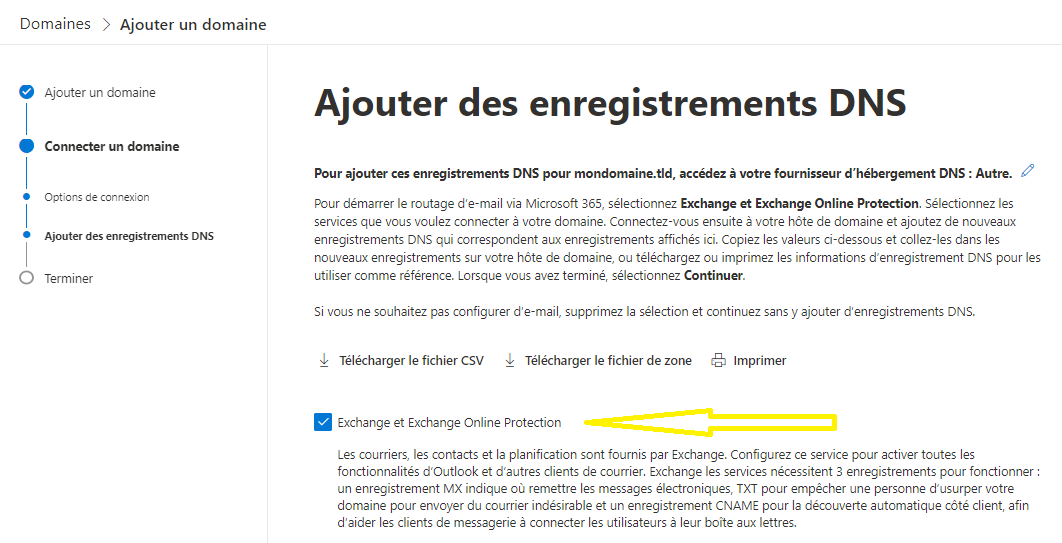
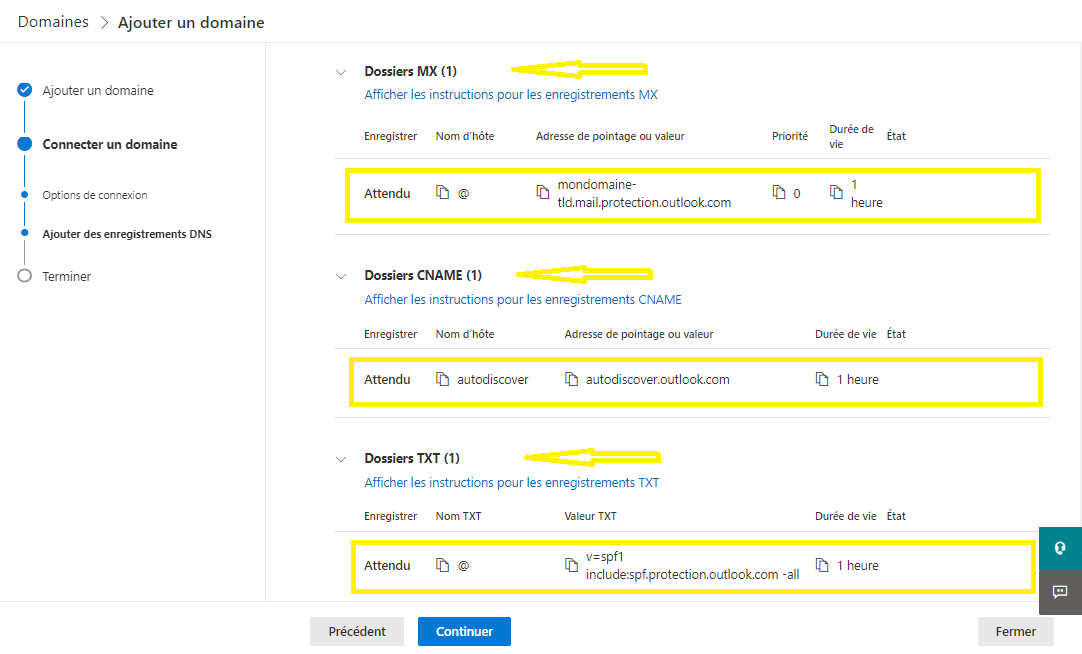
Scroll down to view the records that need to be copied to your domain name DNS zone : MX, CNAME and TXT records.

Click Done.

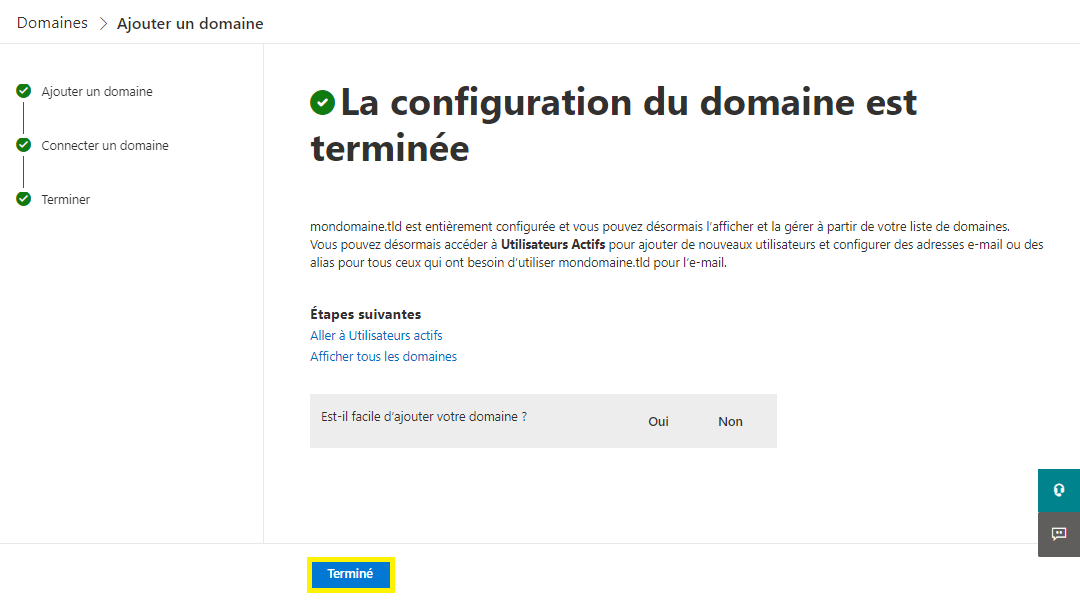
On the added domain list, you will see the Healthy status. If Microsoft panel has been mistakenly closed, you will see Incomplete setup Status. Click simply on the domain name and keep on the configuration steps.

How to link my domain
Benefit
It allows the domain URL to be used for Microsoft 365 services. So instead of going through https://www.office.com/ or https://www.microsoft.com/ the associated domain name will be used as the URL to log into the webmail interface.
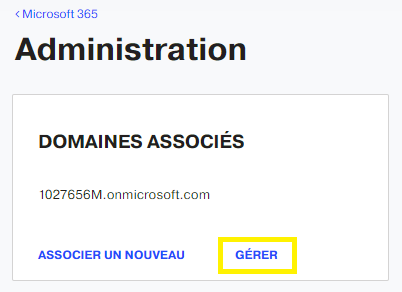
How to link my domain
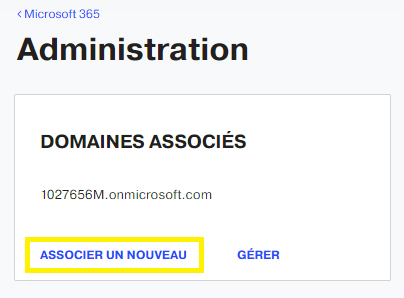
Still on your panel dashboard > left menu Microsoft 365 > ADMINISTRATION > MANAGE link.

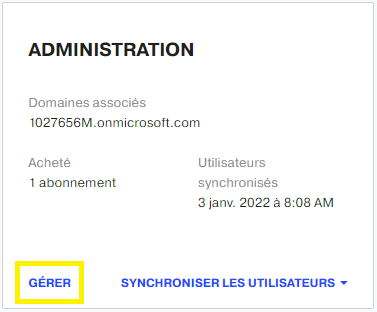
Click LINK NEW.

Panel allows you then to :
- Select a domain among the hosted domains list available on your customer panel.
- Add a new domain which is not registered yet.
- Use an existing domain hosted by another provider. You can keep it external or transfer the domain name from your current registrar to us.

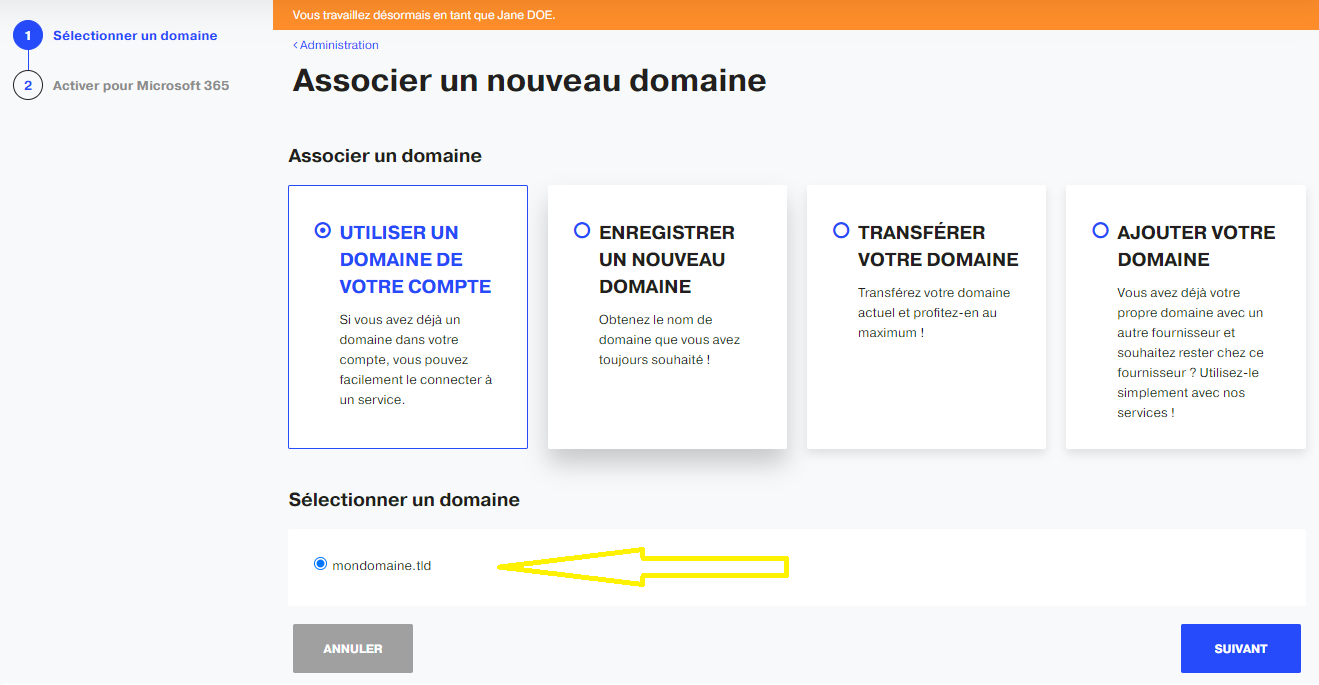
Select Microsoft 365 services to be linked to the domain. Click TERMINER.


Domain name is finally added to the list associated domains list. Microsoft 365 will take a moment for verification.

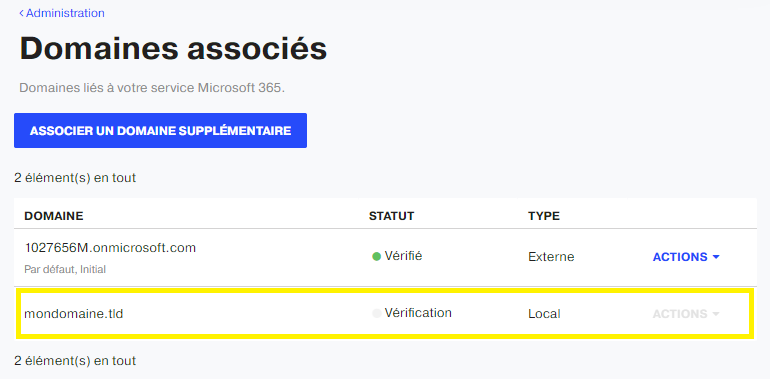
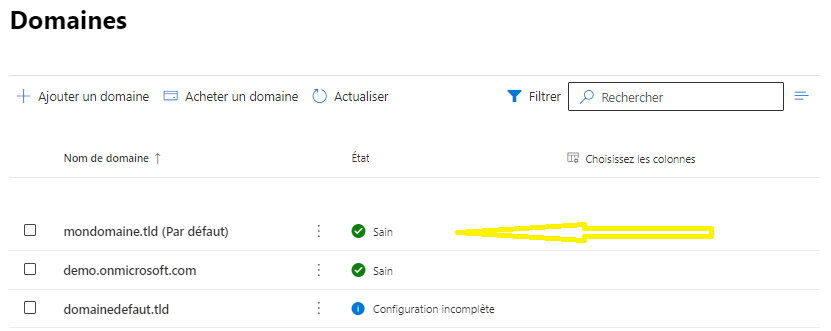
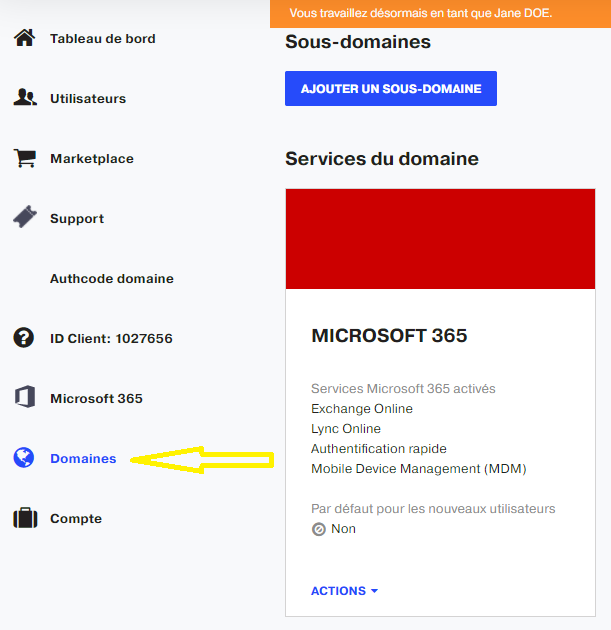
Manage linked domains
Still on your panel dashboard > left menu Microsoft 365 > ADMINISTRATION > MANAGE link.
Click Manage.

Default domain only offers two options within ACTIONS menu.

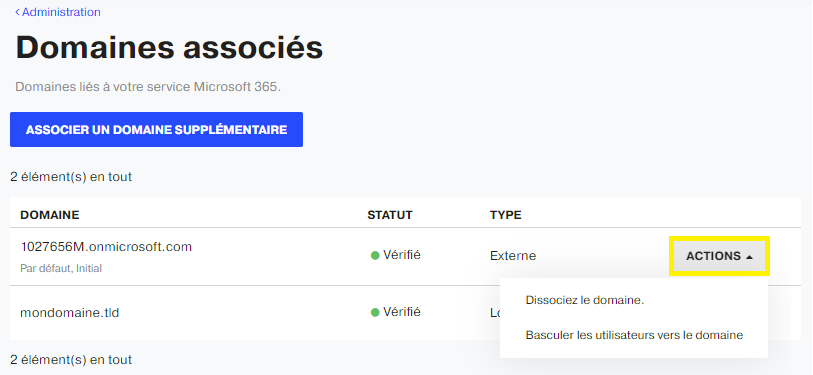
Any other linked domain, has more options in its ACTIONS menu. You only need to focus on available choices.

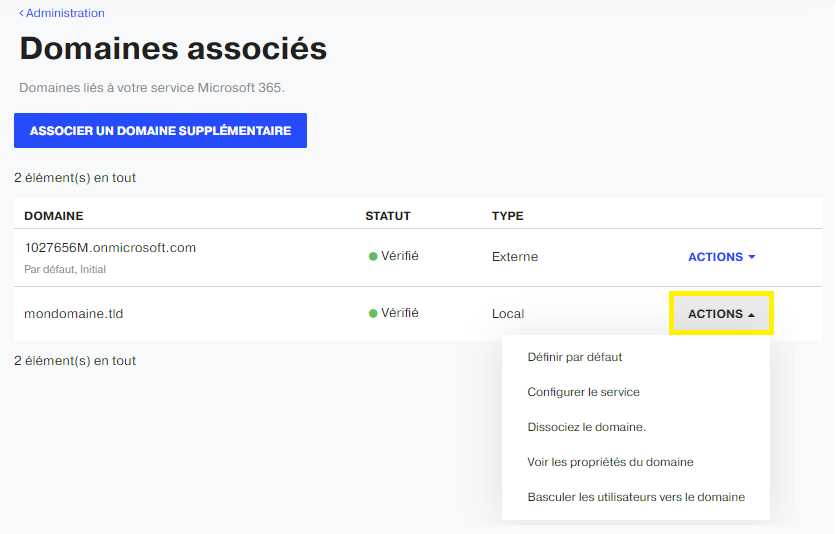
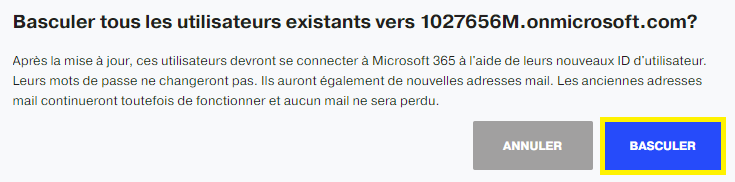
1- Unlink Domain : This will delete the domain from Microsoft 365 account.


2- Switch users to the domain : This will switch created users e-mail addresses to another domain.

3- Set as Defaut : This will define the domain as primary for the account.

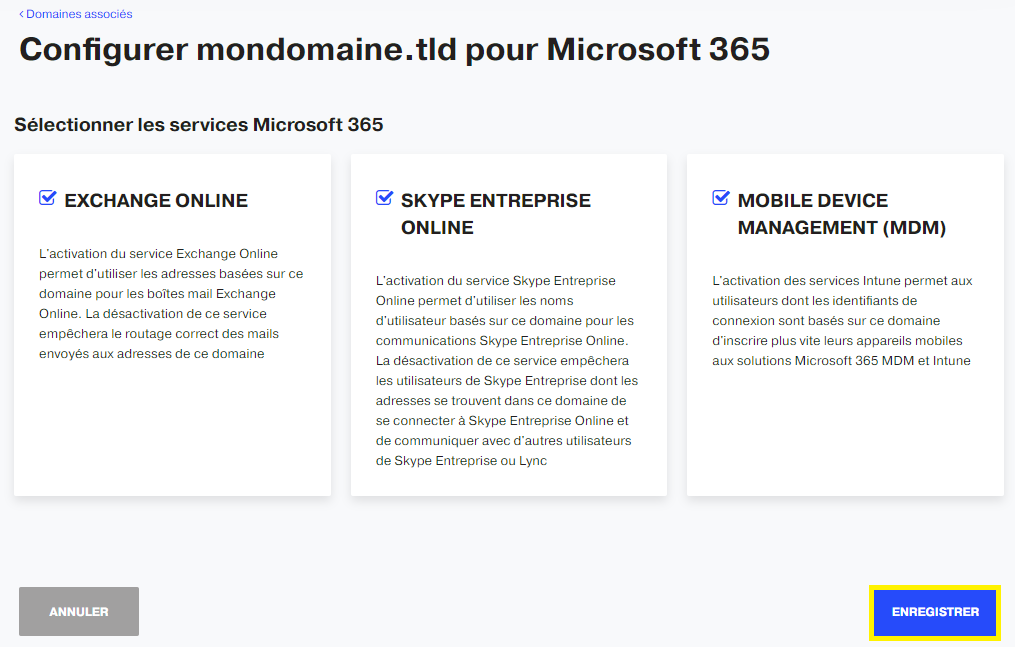
4- Configure Service : This enables or disables Microsoft 365 services for the linked domain.

5- View Domain Properties : This will redirect you to the domain management panel.

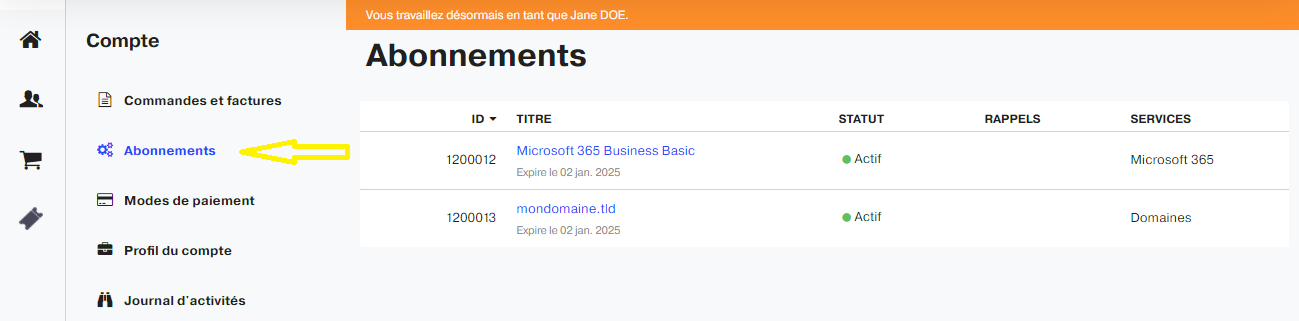
Purchased subscriptions
Still on your panel dashboard > left menu Microsoft 365 > ADMINISTRATION > MANAGE link.
Go to PURCHASED SUBSCRIPTIONS > MANAGE.

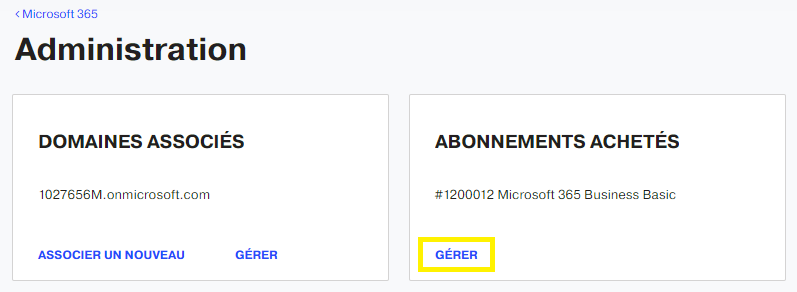
Panel will display Account menu, and precisely the Subscriptions section.

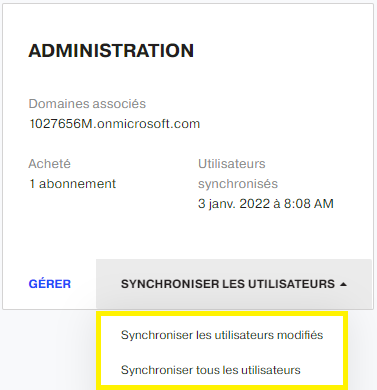
Synchronize users
Still on your panel dashboard > left menu Microsoft 365 .
Tick SYNC USERS available on ADMINISTRATION section. You can choose to sync all users or only edited users.

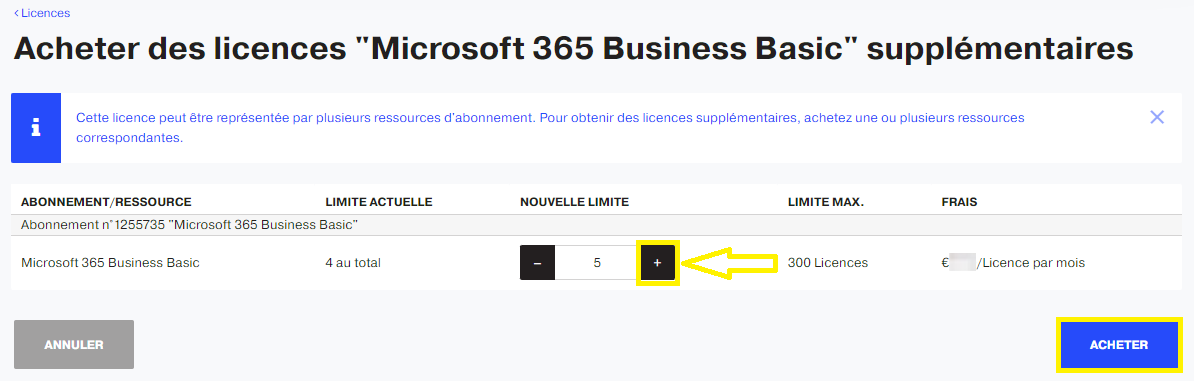
Manage Microsoft 365 licenses
Still on your panel dashboard > left menu Microsoft 365 > LICENSES > MANAGE link.

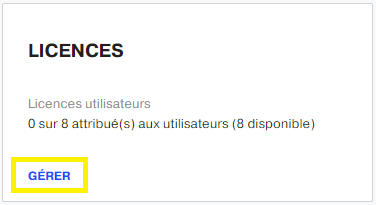
You can buy additional licenses.


Tick + as many as you want to add licenses.

Microsoft 365 users
Still on your panel dashboard > left menu Microsoft 365 .
Microsoft 365 users displays several options.


Add Microsoft 365 users
In order to add a Microsoft 365 user, follow this link to view all steps.


Reassign licenses
You can change user's assigned licenses.

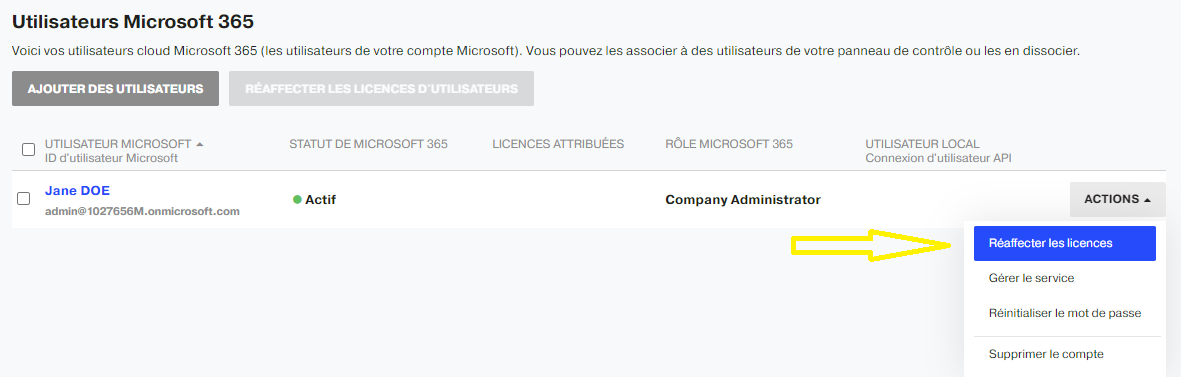
Tick the licenses to assign and click ASSIGN.

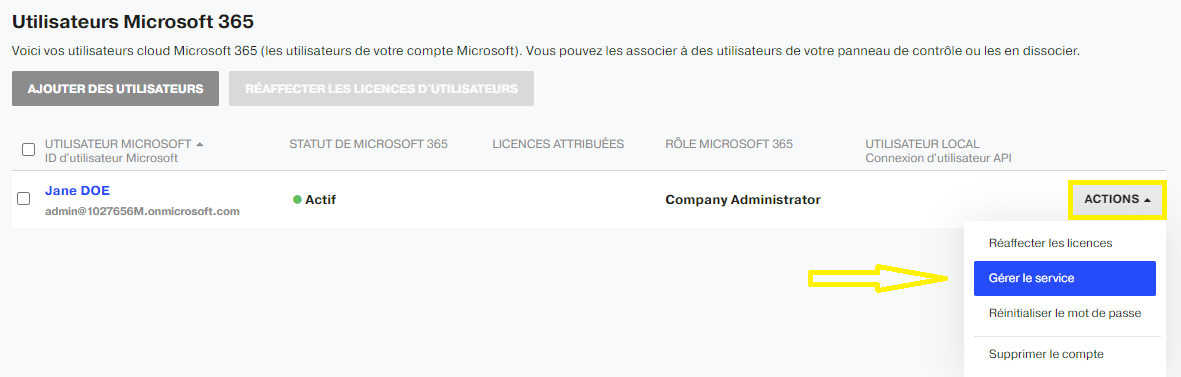
Manage service
You can manage Microsoft 365 service related to the selected user.
Panel displays several other options.

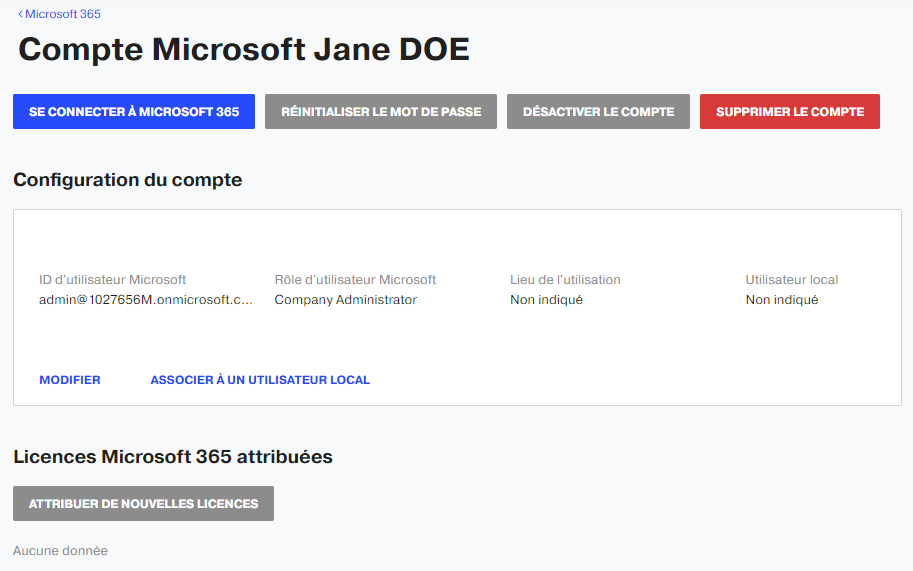
LOG IN TO MICROSOFT 365
This button goes to the official Microsoft 365 management panel https://portal.microsoftonline.com/.


Login and password will not be requested.

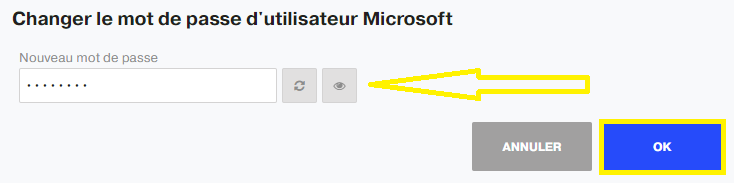
RESET PASSWORD
In case you forget your password, click RESET PASSWORD.

Create a new password.

DISABLE ACCOUNT
This action allows you to disable a user without related data removal.

Confirmation pop-up window will appear, click on DISABLE.


REMOVE ACCOUNT
Microsoft 365 user account removal will also remove all data related to it.

Confirmation pop-up window will appear, click on REMOVE.


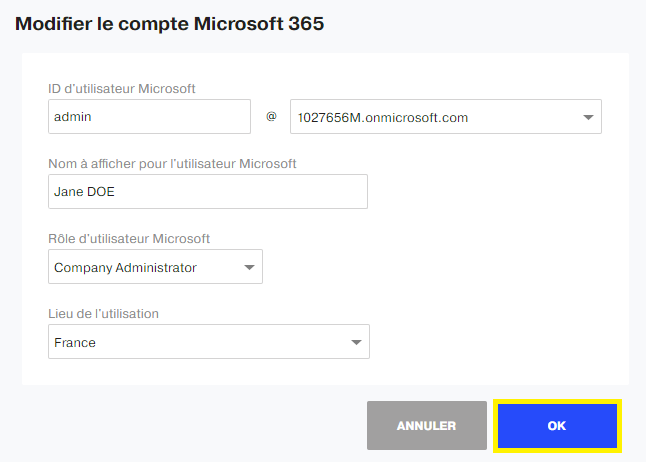
Edit Microsoft 365 account
You can change Microsoft 365 user account data.

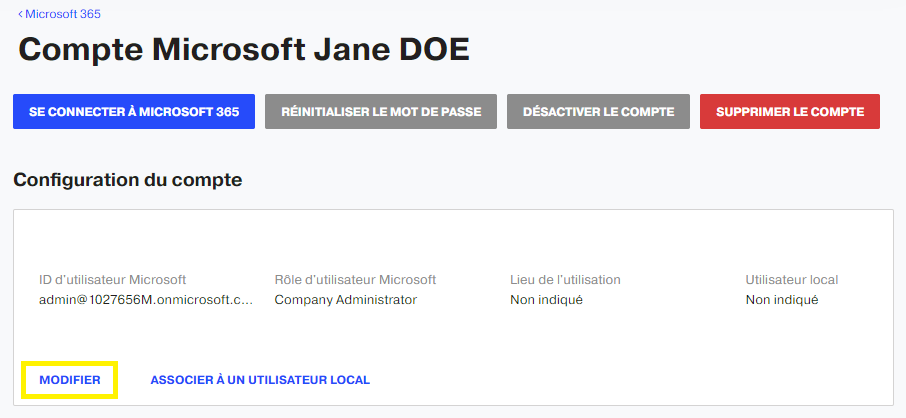
It is forbidden to use the same Microsoft user ID. Click OK after making changes.

LINK TO LOCAL USER
This action links a Microsoft 365 account to a local customer panel user.

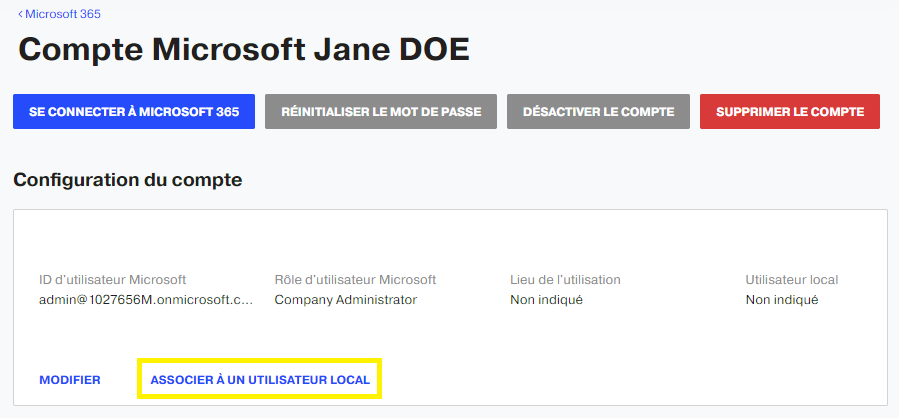
Tick selected local user and click LINK.


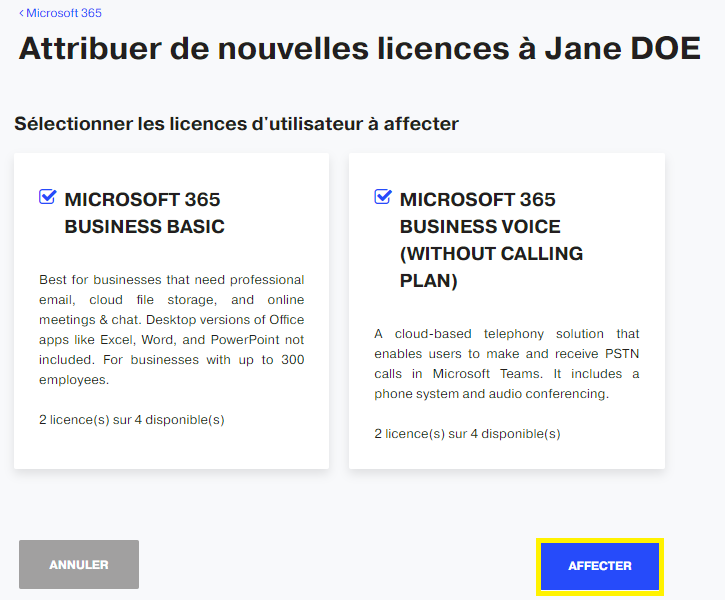
ASSIGN NEW LICENSES
You can change user's assigned licenses.

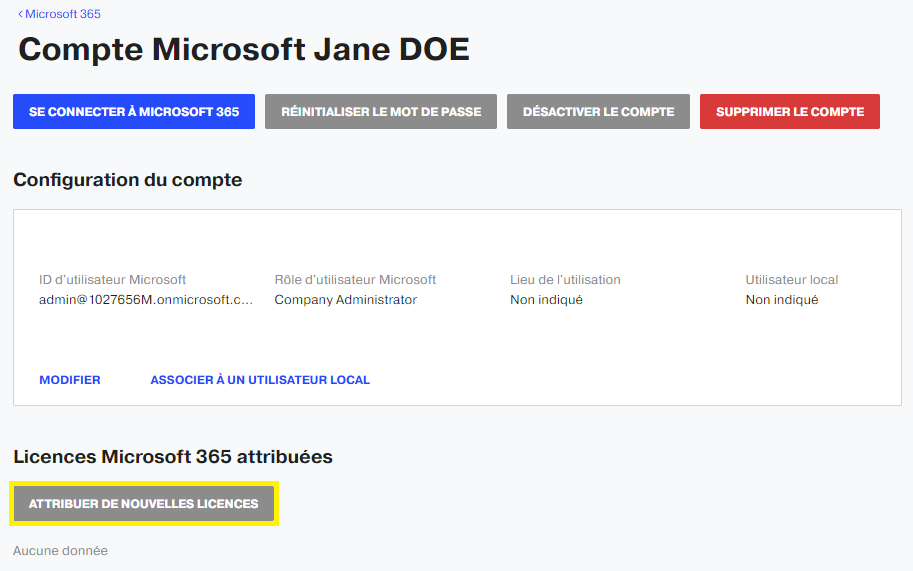
Tick the licenses to assign and click ASSIGN.