
In this guide, we will see how to manage a Cloud Evolution server.
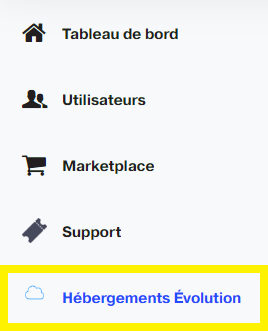
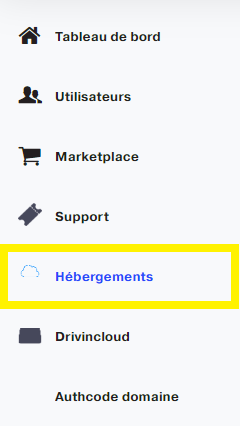
First, go to your trademark control panel, Magic Online or Nuxit.
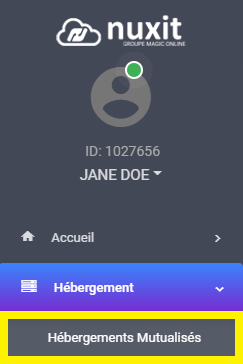
Then follow the menu Lodging Evolution.
It is necessary to activate POP-UP so that the new page displaying the menu Shared Hosting opens.
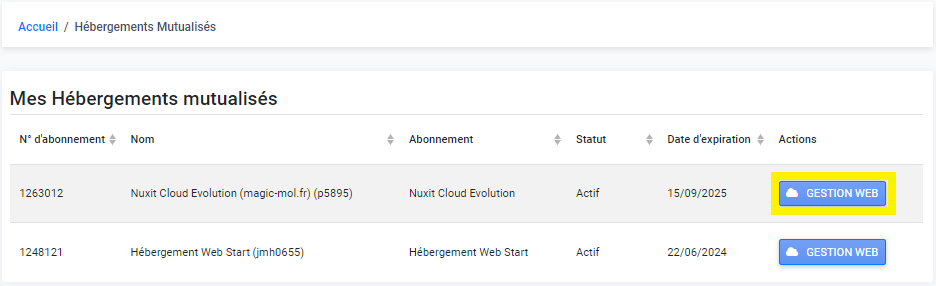
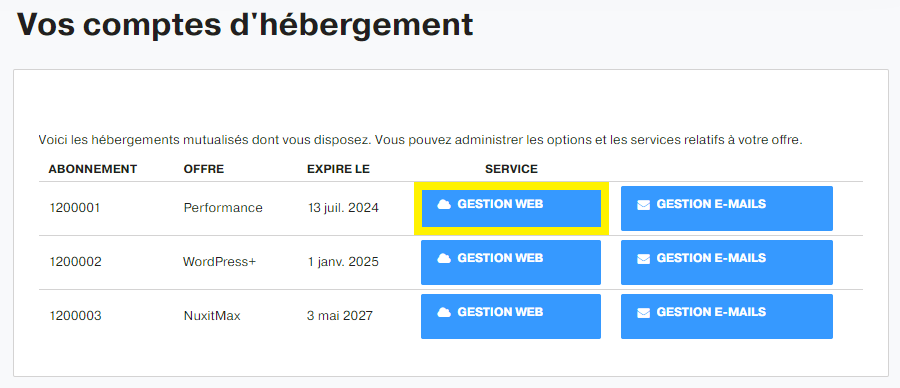
The interface finally lists the shared offers. Click on the button WEB MANAGEMENT of the subscription Nuxit Cloud Evolution.
The space provides all the options available to properly manage the server. The subscriber will be able to:
- Change the name of the Cloud Evolution
- View the characteristics of the offer
- View technical information
- FTP access via DRINVINFTP
- Restart Cloud Evolution
- Change SSH password
- List and add FTP accounts
- Encrypt a password
- View traffic and statistics
- Visualize the monitoring
- Add CRON tasks
- Installing an SSL certificate
- Attach an existing domain
- Add a MYSQL database
- Manage existing MYSQL databases
- Install a CMS
Change the wording
To change the name of a Cloud Evolution server, click on the Lodging Evolution from the client area, then, in the new POP-UP window that opens, follow the MANAGEMENT WEB of the Cloud server, and finally the Edit of the section Server.
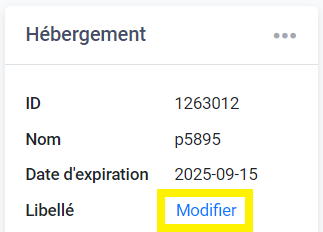
Put the chosen wording and validate.

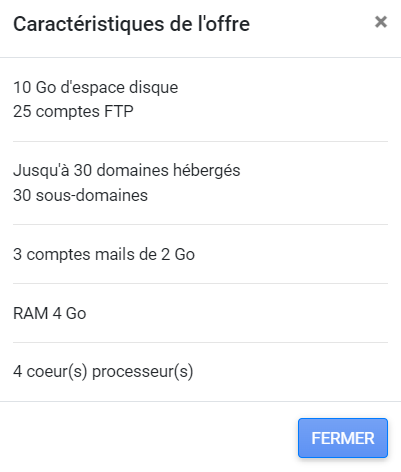
Features of the Evolution Cloud
To see the resources allocated to a Cloud Evolution server, click on the Lodging Evolution from the customer area, then, in the new POP-UP window that opens, follow the button MANAGEMENT WEB of the Cloud server, and finally the CHARACTERISTICS OF THE OFFER.
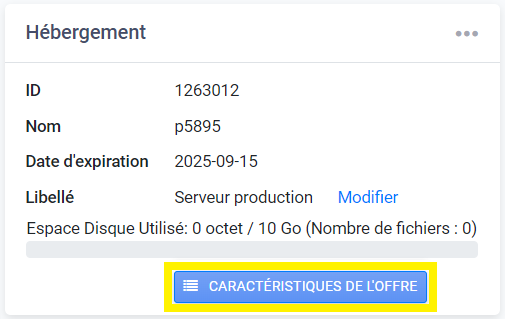
The details of the server can be found on this page.
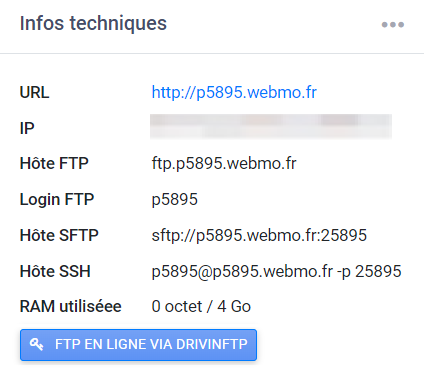
Technical information
The technical information for a Cloud Evolution server can be found in the customer area > menu Lodging Evolution > button MANAGEMENT WEB > section Technical information.
Restarting a Cloud Evolution
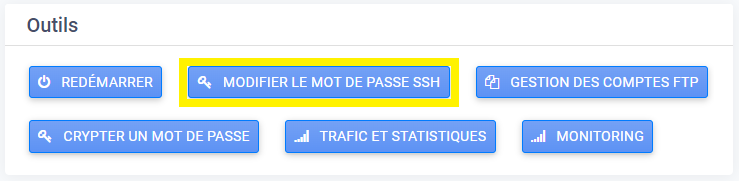
When you need to restart the Cloud Evolution server, first click on the RESTART of the section TOOLS.
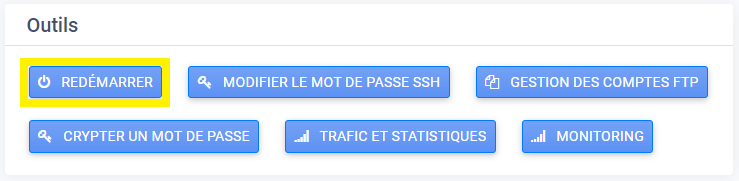
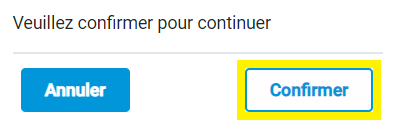
The system asks for confirmation.
Once this is done, the reboot is launched. You have to wait a few minutes until the server is accessible again.

Change SSH password
To change the SSH password for a Cloud Evolution server, go to the customer area > menu Lodging Evolution > button MANAGEMENT WEB > section TOOLS > button CHANGE SSH PASSWORD.
Set the new value and confirm with the button OK.

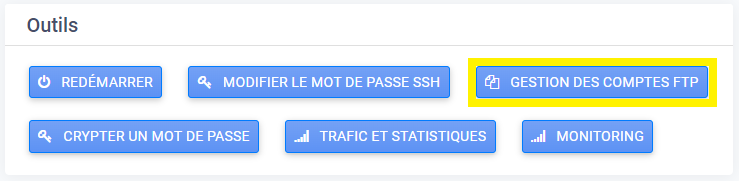
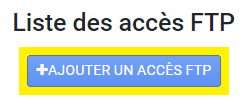
List FTP accounts
To manage FTP access to a Cloud Evolution server, simply access the customer area > menu Lodging Evolution > button MANAGEMENT WEB > section TOOLS > button FTP ACCOUNT MANAGEMENT.
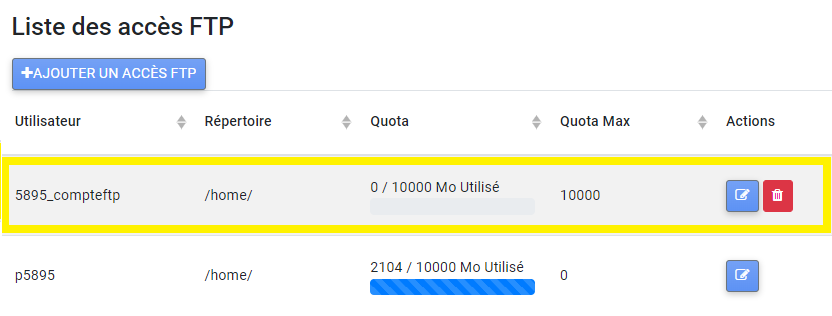
The interface displays the list of FTP accounts. There is a default account, which cannot be deleted. Only the password of this account can be changed.
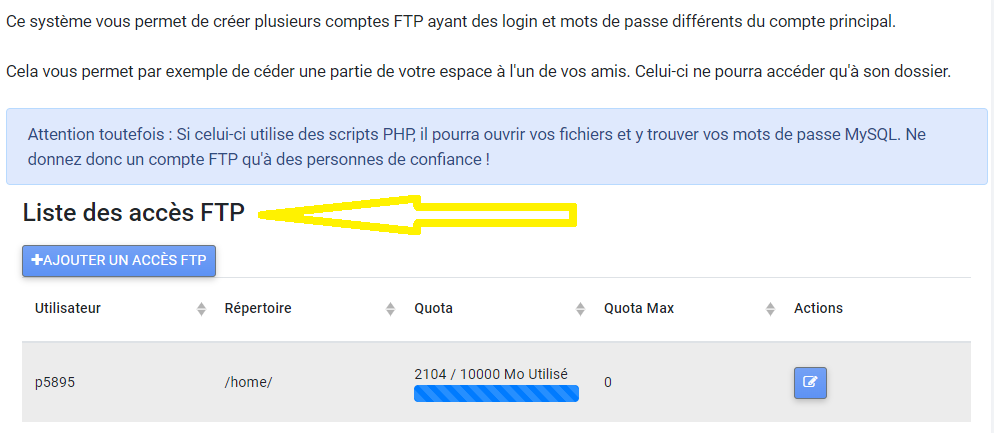
Add an FTP account
Always on the customer area > menu Lodging Evolution > button MANAGEMENT WEB > section TOOLS > button FTP ACCOUNT MANAGEMENT > finally button ADD FTP ACCESS.
You need to specify the root directory, FTP login, password, and space quota.
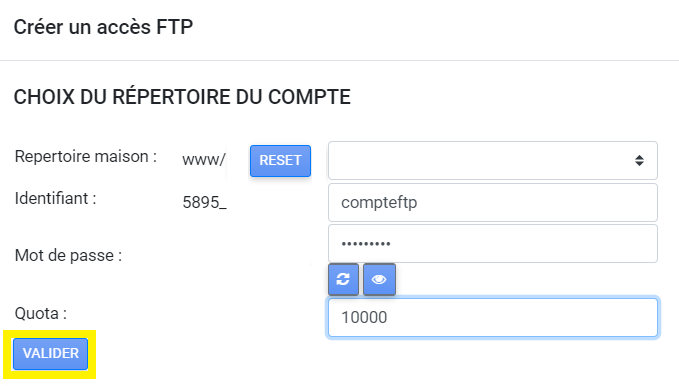
Click Sign In once again. VALIDATE. The add message is displayed.

The account is added. The interface allows you to edit or delete it.
Encrypt a password
To encrypt a password, you had to go to the customer area > menu Lodging Evolution > button MANAGEMENT WEB > section TOOLS > button ENCRYPT A PASSWORD.

Then choose the encryption protocol, and put the login and password.
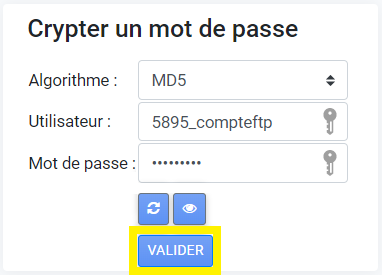
The result of the encrypted password is finally displayed.

Monitoring
To consult the traffic and statistics, first follow the button SERVER of the section TOOLS.

It is possible to sort by incoming, outgoing traffic, RAM and CPU load.

Attach a domain
Access your customer interface MAGIC or NUXIT.
Follow the menu Lodging.
Follow the button WEB MANAGEMENT of the accommodation in question.
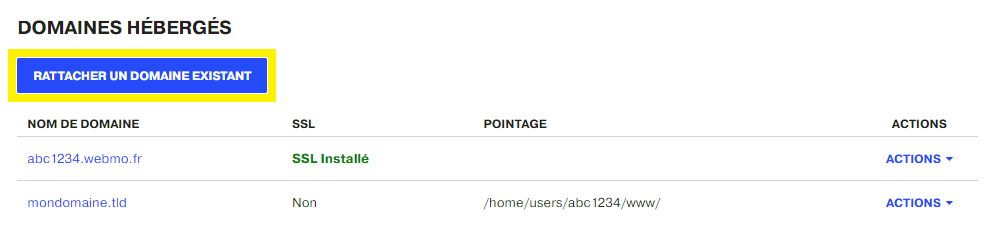
In the section HOSTED DOMAINSclick on the button ATTACH AN EXISTING DOMAIN.
Fill in the requested information:
- The domain name
- The subdirectory to which it should point
In the example below, we will associate newdomain.tld to the root folder www.
The checkbox SSL redirection allows to automatically redirect the http flow to https.
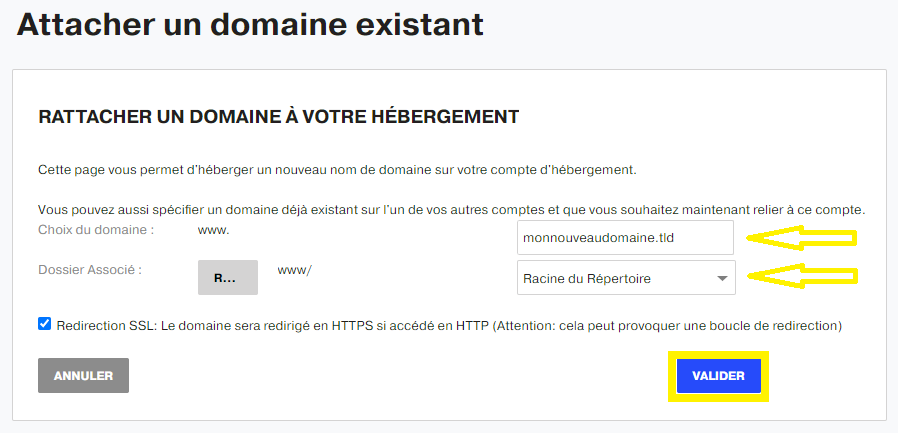
Click on the button Validate to confirm the installation of the domain name on your hosting.
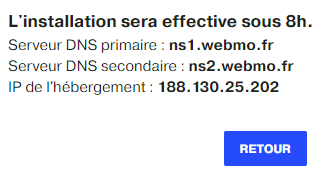
To manage the domain, here is the right help link.