In this guide we will see how to add an optimized WordPress site.
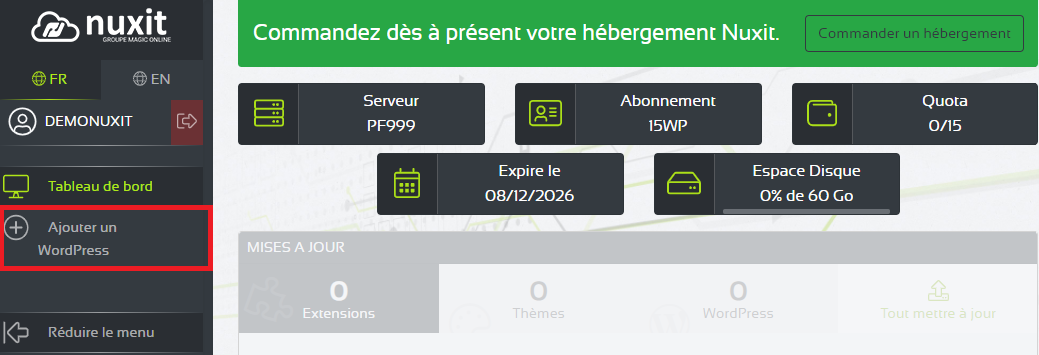
Just go to your customer interface, which you can find on our website.
Once on it, click on the heading Add a WordPress.
You will see a complete page for creating your WordPress. Start by choosing your WordPress name, administrator name and password.
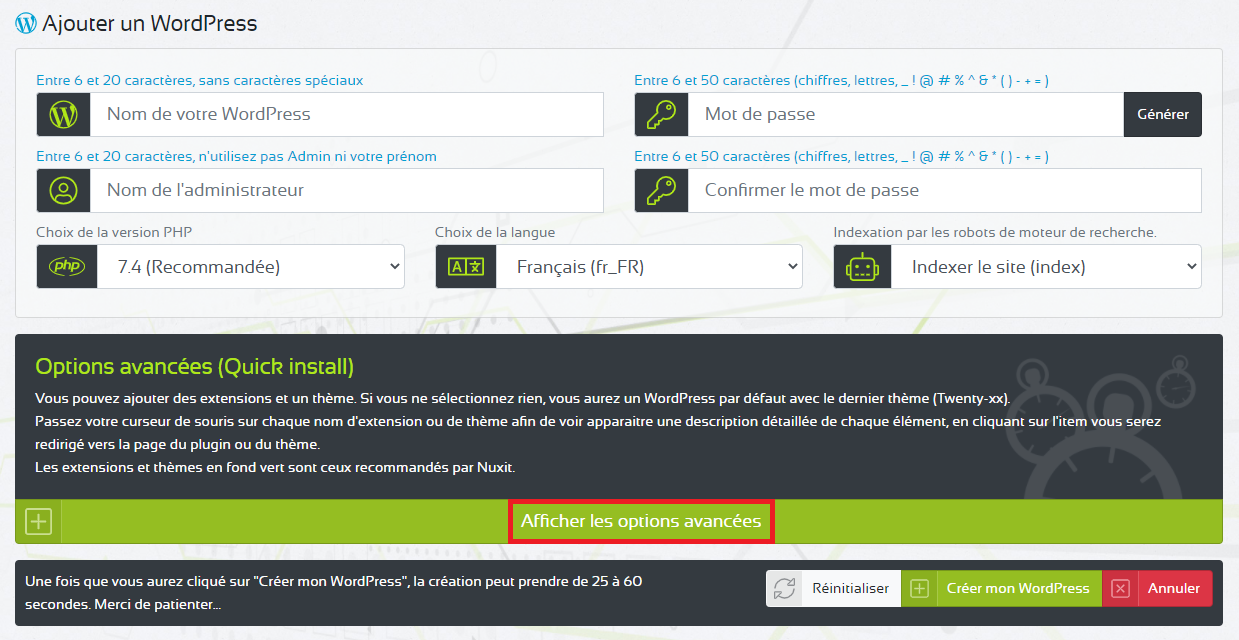
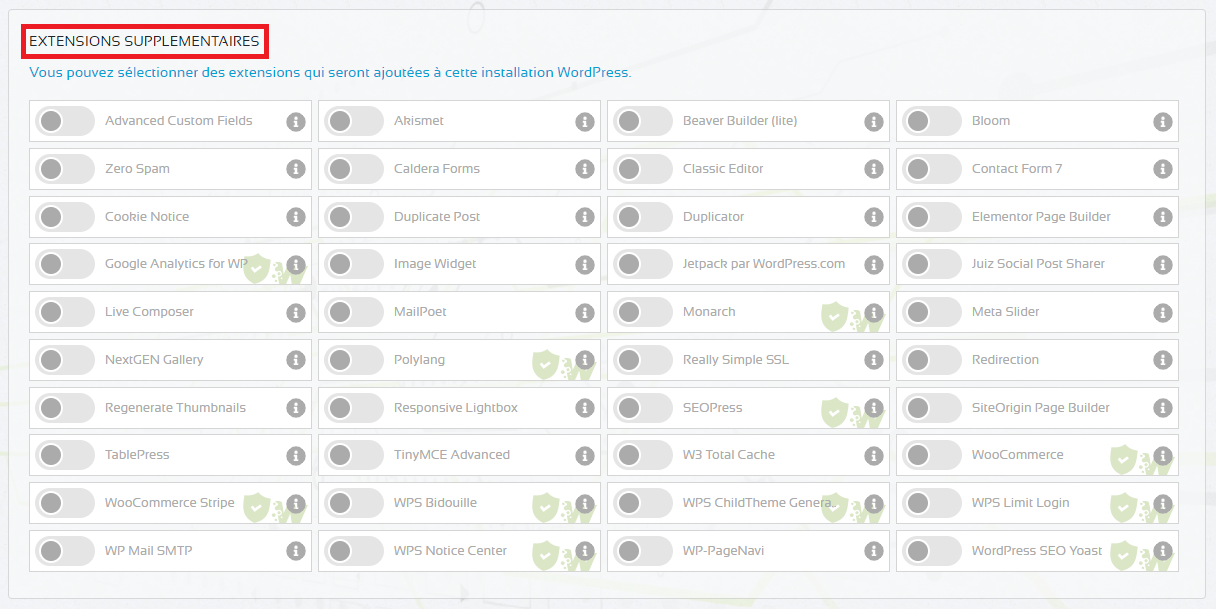
Then select plugins and a theme, which will be automatically installed and activated on your WordPress with our QuickInstall system (Read more) :


Click on the button Create my WordPress to start the installation.


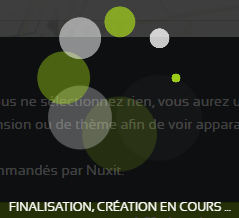
Your WordPress will be created in 25 to 35 seconds. You will see a loading icon.

Once this is gone, a success message will appear to indicate that the operation was successful.

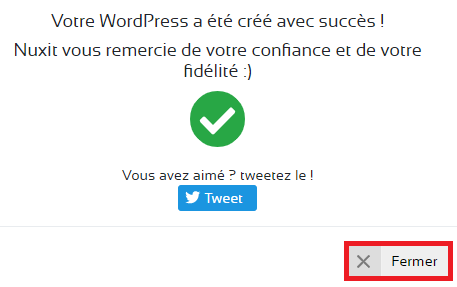
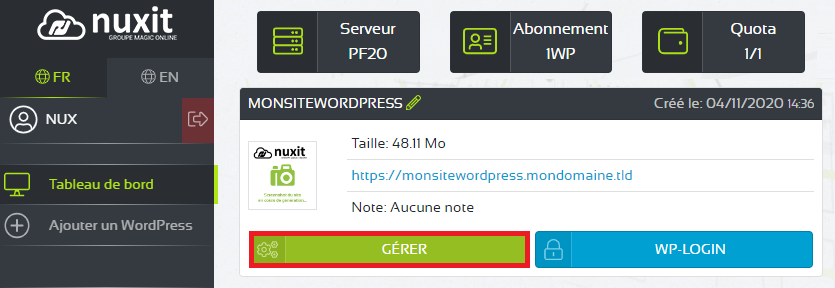
The page will reload and display your WordPress management interface. You will also receive an email with all the connection information (URL, login URL, password, FTP codes, PhpMyAdmin...). Click on the button Manage.

WordPress Console
From this panel you can :
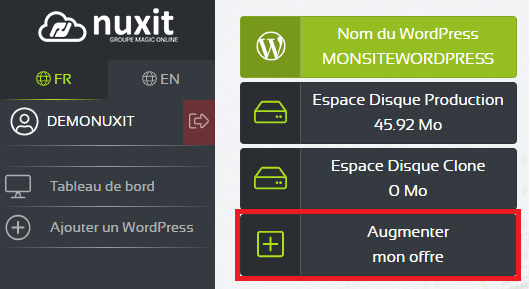
- View information about your WordPress site (the name of your WordPress site, the disk space allocated to the production site, the disk space allocated to the site clone),
- Increase your offer,
- Change the domain name,
- Access your WordPress site,
- Administering your WordPress,
- Configure automatic connection,
- Clone as a new WordPress,
- Update your WordPress site extensions,
- Start a database cleanup,
- Run a URL Check on your WordPress site,
- Run an Integrity Check on your WordPress site,
- Clear Server Cache,
- Manage PHP parameters,
- Change the PHP version,
- View FTP settings,
- Change FTP password,
- View the name of your MySQL database,
- Access to the PHPMyAdmin interface,
- View, download or clear error logs,
- View or download access logs,
- Manage a technician,
- Switch to expert mode,
- Reset your WordPress site,
- Delete your WordPress site,
- Clone your WordPress site,
- Manage your WordPress site clone,
- Backing up your WordPress site,
- Manage backups of your WordPress site,
- View the history of actions performed from the console.
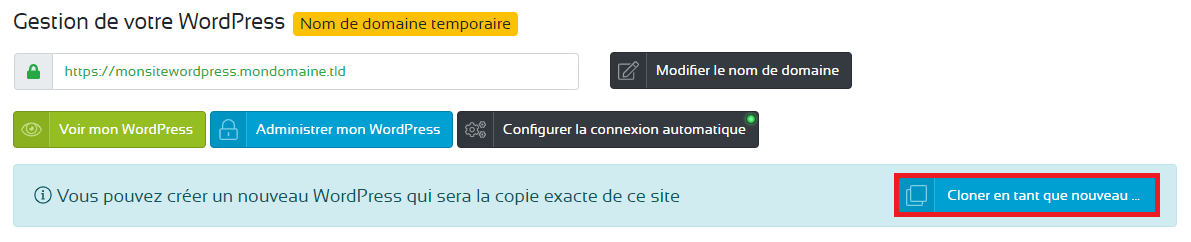
Managing your WordPress
This section allows you to :
- Change the domain name,
- Access your WordPress site,
- Administering your WordPress,
- Configure automatic connection,
- Clone as a new WordPress.
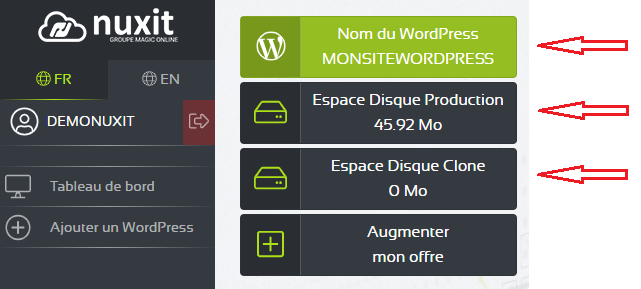
View your WordPress info
On your console interface, once your WordPress site is created, you will see information about it. Such as:
- The name of the WordPress,
- The disk space of the site in production,
- The disk space of the clone if you have created one.

Increase your offer
On your console interface, you have the possibility, at any time, to upgrade your offer and increase the number of WordPress sites you can create.
This upgrade allows you to automatically increase the disk space allocated to your account to accommodate new sites according to the number of WordPress sites you choose.

The button Increase my offer redirects you to our online store so you can upgrade to the offer that suits you.
Access your WordPress site
On your console interface, you can access your WordPress site at any time.
To do this, click on the button See my WordPress.


Administering your WordPress site
On your console interface, you can access the Back-Office interface of your WordPress site at any time.
To do this, click on the button Administer my WordPress.


Configure automatic connection
On your console interface, you can activate the automatic connection to the Back-Office interface of your WordPress at any time.


Just click on the button Inactiveselect the user, then Register modifications.


Once active, you will be able to connect to the administration of your WordPress without entering a password, from your Nuxit console via the Administer my WordPress.


Clone as a new WordPress
On your console interface, you have the possibility, at any time, to clone your site as a new WordPress. But only if you have the resources to do so and if you have not exceeded the number of WordPress created on your package.
In other words, it requires that you have at least one free WordPress on your account. Subscribers who have "one WordPress" cannot use this feature. If you don't have any free WordPress, upgrade and you can apply this cloning.
Click on the button Clone as a new WordPress.

The interface will ask you to enter the name of the new cloned WordPress.


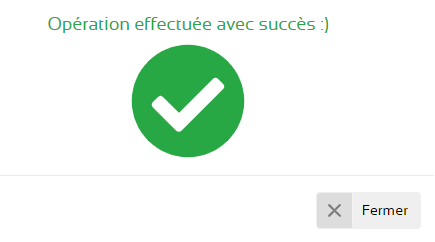
Enter the name of your choice and validate. A success message will appear. Click on Close.
As soon as the cloning process is complete, you will be redirected to your console's homepage and you will see your new cloned WordPress.

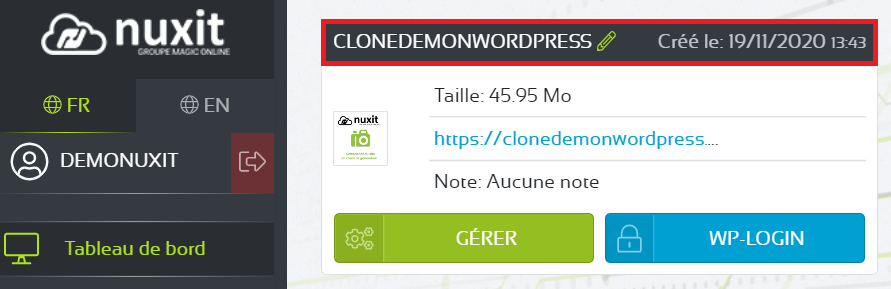
It is now a fully independent WordPress, and not a simple clone for testing as we propose here.
As always, you will receive an email containing all the information needed to connect to your WordPress (PhpMyAdmin interface, FTP access, etc).
As a reminder, this feature is only available if you have a free WordPress on your console. If you don't have one, you can upgrade to the next level to use it
Your WordPress actions
This section allows you to :
- Update your WordPress site extensions,
- Start a database cleanup,
- Run a URL Check on your WordPress site,
- Run an Integrity Check on your WordPress site,
Clean up the database
From your console, you can optimize and repair your database, without using a plugin or phpmyadmin.
Throughout the life of your WordPress site, your database grows as it stores a lot of information. Some of this information (comment data, cache, unused keywords, etc.) can overload the database unnecessarily and cause performance drops on your website. The optimization/repair allows to speed up the processing of information in the database.


This operation repairs, optimizes and removes unnecessary data from your database. It is advisable to perform this cleaning about once a month.

Launch a Check URL
This script checks the URLs in your WordPress database.
It will immediately notify you of any URL that is different from the declared URL of your site and allow you to correct it in one click.


If there is no URL other than your domain name, the interface will display the following message.


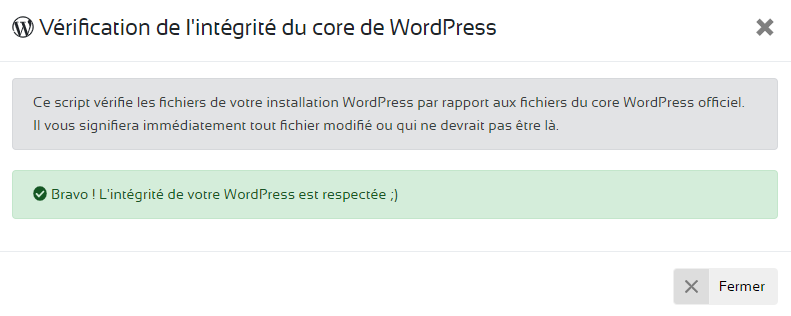
Run an Integrity Check
This script checks the files in your WordPress installation against the official WordPress core files. It will immediately notify you of any files that have changed or that should not be there.


If there are no modified files, the interface will display the following message.

Your server actions
This section allows you to :
- Clear Server Cache,
- Manage PHP parameters,
- Change the PHP version,
- View FTP settings,
- Change FTP password,
- View the name of your MySQL database,
- Access to the PHPMyAdmin interface,
- View, download or clear error logs,
- View or download access logs,
- Manage a technician,
- Switch to expert mode,
- Reset your WordPress site,
- Delete your WordPress site,
Clear Server Cache
The cache is a place where web pages and other items are stored in memory so they can be retrieved quickly.
Basically, web servers and browsers use HTML instructions to create pages one by one from components stored in different locations. Without a cache, these pages will have to be built each time the server is prompted to provide the page. The cache stores this page in memory so that it can be used again and again.
For a WordPress website, there are three types of cache:
- Browser Cache - This is a place on your computer where your browser stores information about a website that does not change often. Rather than downloading the same information each time you visit the website, the browser retrieves the information from its memory. The Web page loads faster and the network uses less data.
- Cache Plugin - This is a plugin designed specifically to provide predefined web pages, speeding up the time needed to recreate the page from HTML instructions.
- Server Cache - Using our own cache plugin, your host can store predefined web pages in memory for delivery to your visitors, thus reducing the load on the server.
Click on Clear server cache to apply this operation.


The server will indicate a successful dump.

Reset your WordPress site
Rather than deleting and recreating a WordPress, you can do a reset. This way you keep your plugins, themes and other settings but with a brand new WordPress
To do this, access your console to select the WordPress to administer and click on the MANAGE.
At the bottom, click on the button Reset this WordPress.


With this button, all the articles as well as the pages, images and the database will be emptied. However, plugins, themes and other settings will be kept.
A dialog box appears on your screen. You must write the word RESET to confirm the reset.

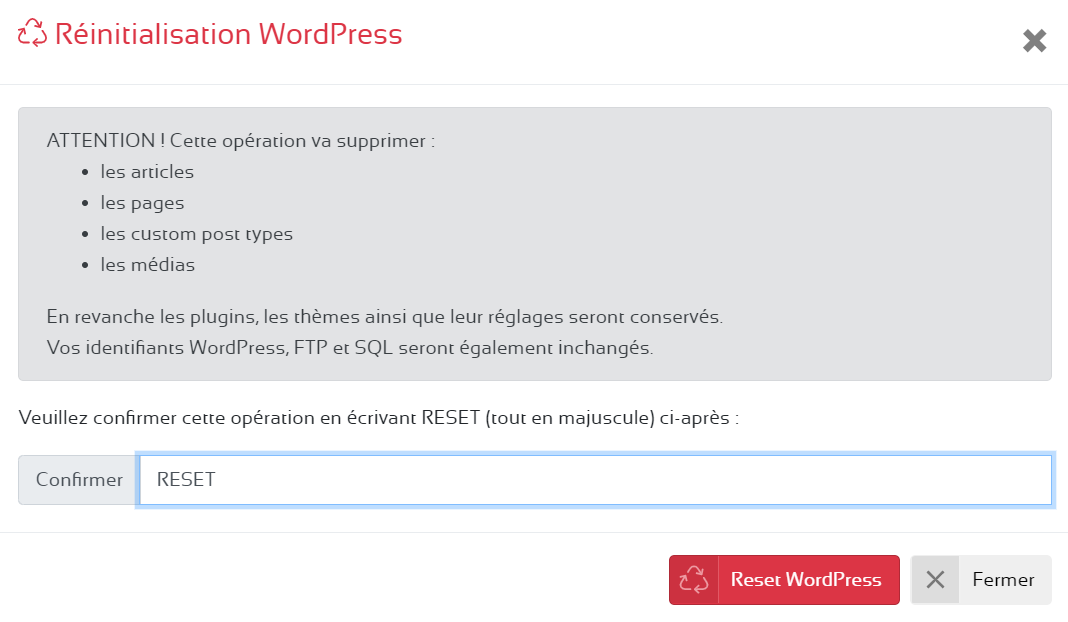
With this reset, backups and clones will always be present.
Delete your WordPress site
Select the WordPress to administer by clicking on the MANAGE.
Then at the bottom, click on the button Remove this WordPress.

A dialog box appears on your screen. You must write in capital letters DELETE PROD to confirm the deletion.


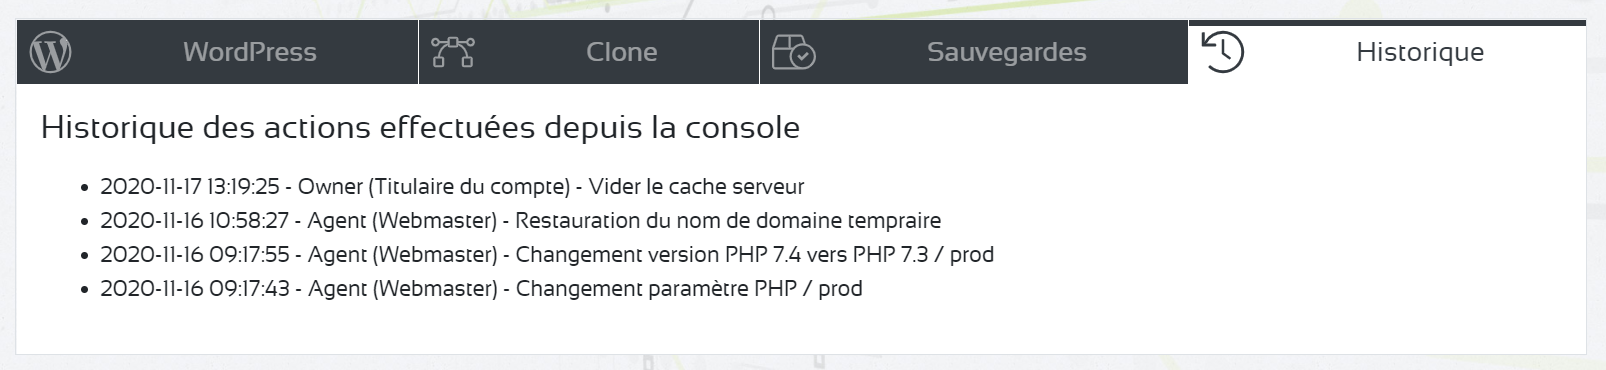
History of the console's actions
To view the history of actions taken from the console, select the WordPress to administer by clicking on the MANAGE.
Then follow the tab History.