In this guide, we will see how to manage email addresses from your customer area.
View my mail accounts
First, go to your trademark control panel, MAGIC or NUXIT.
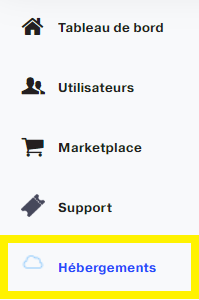
First click on Lodging in the left menu.

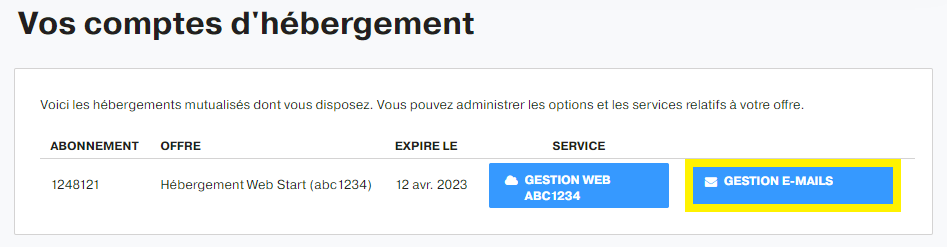
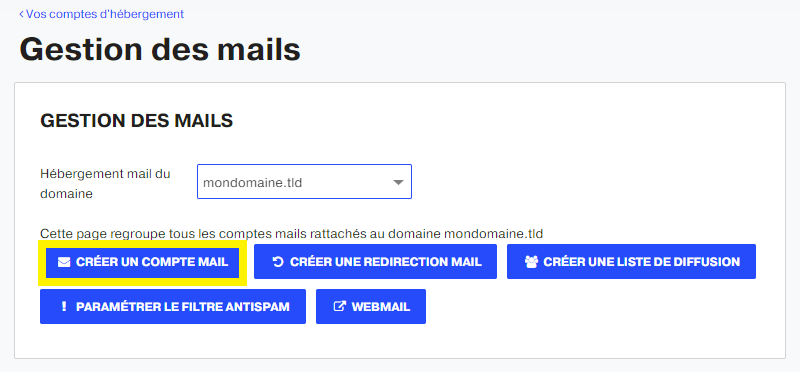
Then go to EMAIL MANAGEMENT of the accommodation in question.

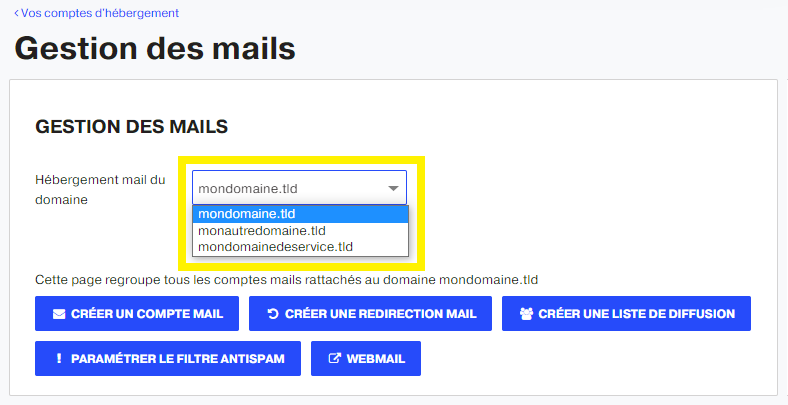
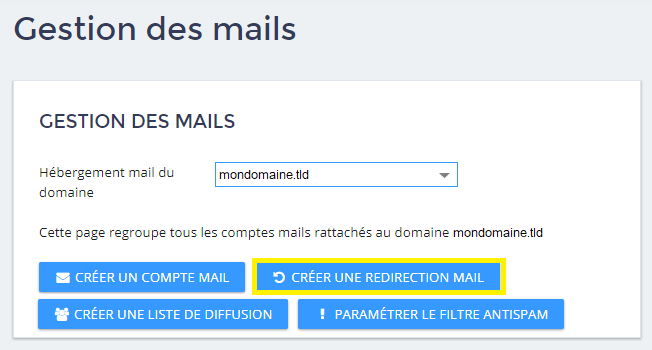
Select the domain in question from the drop-down list.

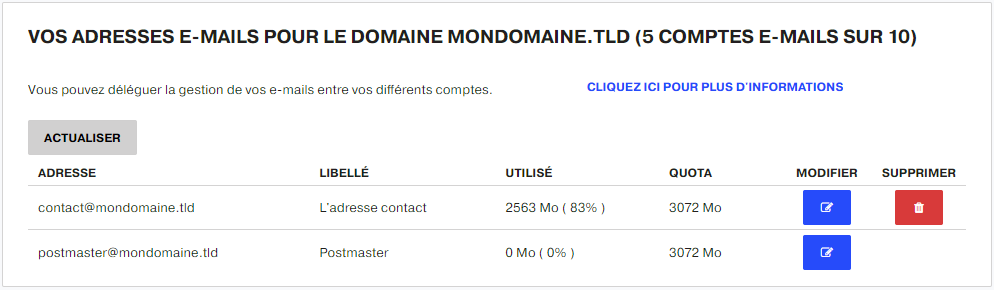
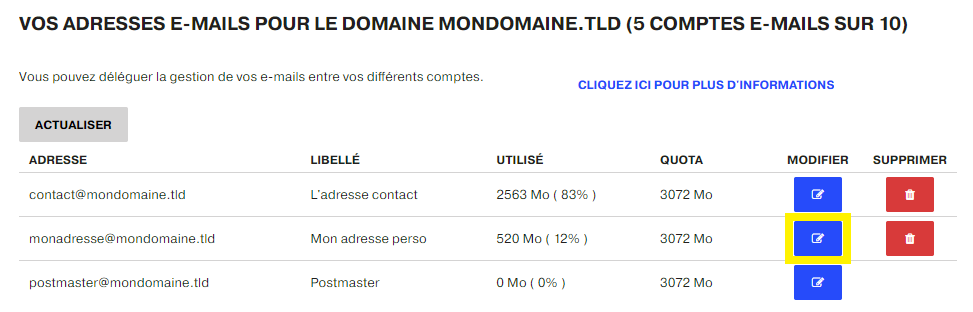
At the bottom, the list of e-mail addresses related to the domain is displayed. Note that the postmaster address is a system address and cannot be deleted.

Create an email address
Always in the dashboard of the customer area > menu Lodging > button EMAIL MANAGEMENT > Select the domain in question from the drop-down list.
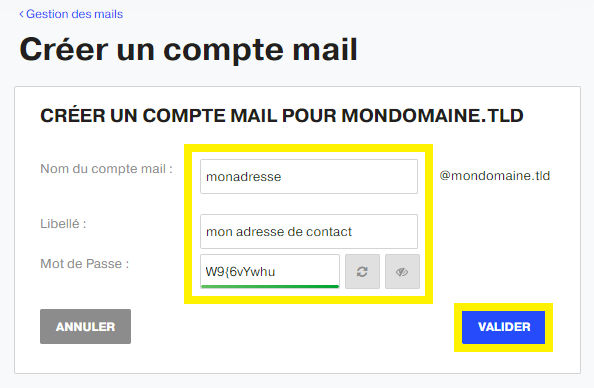
Click on the button CREATE AN EMAIL ACCOUNT.

The form for creating a new email account is displayed.
Fill in the fields as follows:
- Name of the email account Put the name of the desired mail.
- Wording The description of this email account.
- Password The associated password.
The password must be at least 8 characters long and start with a number or a letter. You can let the system choose a strong password for you.
Confirm the creation of the account by clicking on the button VALIDATE.

The new e-mail account is finally added to the list of addresses.


Password for a mail account
It is not possible to retrieve or display the password of an email address. You just have to change it by following these steps.
Always in the dashboard of the customer area > menu Lodging > button EMAIL MANAGEMENT > Select the domain in question from the drop-down list.
In the section YOUR EMAIL ADDRESSESClick on the icon to change the address.

Enter the new password, or rely on the system to set a secure password. It is possible to change the wording.


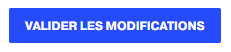
Click Sign In once again. VALIDATE THE CHANGES.

Automatic response
It is possible to add an automatic reply of absence or information on an e-mail address. Just follow these steps.
Always in the dashboard of the customer area > menu Lodging > button EMAIL MANAGEMENT > Select the domain in question from the drop-down list.
In the section YOUR EMAIL ADDRESSESClick on the icon to change the address.
Check the option Enable absence notification and put the Subject and the Message of the unavailability. Finally click on VALIDATE THE CHANGES.


Redirection ofan email account
The interface allows you to redirect incoming e-mails to another external or internal e-mail address (belonging to the same domain).
Always in the dashboard of the customer area > menu Lodging > button EMAIL MANAGEMENT > Select the domain in question from the drop-down list.
In the section YOUR EMAIL ADDRESSESClick on the icon to change the address.
Check the option Redirect email address and put the redirection email address. Finally press VALIDATE THE CHANGES.


Activate the filter Anti-Spam
To fight against spam, it is possible to activate the filter. In this case, e-mails detected as spam will be automatically moved to the Undesirable of the email account.
Always in the dashboard of the customer area > menu Lodging > button EMAIL MANAGEMENT > Select the domain in question from the drop-down list.
In the section YOUR EMAIL ADDRESSESClick on the icon to change the address.
Check the option Spam detection to have the received e-mails filtered. Finally click on VALIDATE THE CHANGES.


Set up the filter Anti-Spam
Always in the dashboard of the customer area > menu Lodging > button EMAIL MANAGEMENT > Select the domain in question from the drop-down list.
Click on the button SETTING UP THE SPAM FILTER.

Create an ALIAS

Fill in the input fields.


Click on the VALIDATE button to create the redirection.
The Alias will be displayed in the list of your redirects.

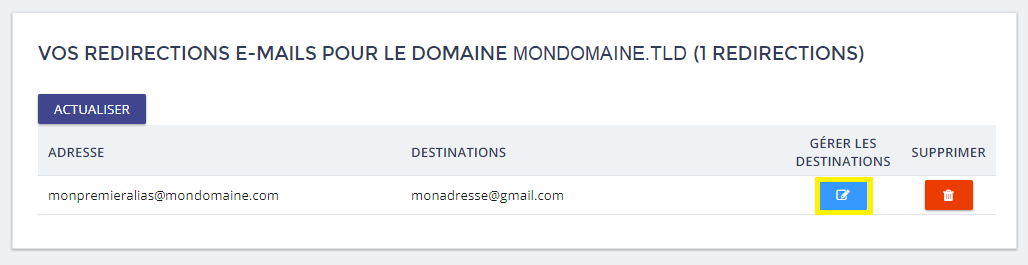
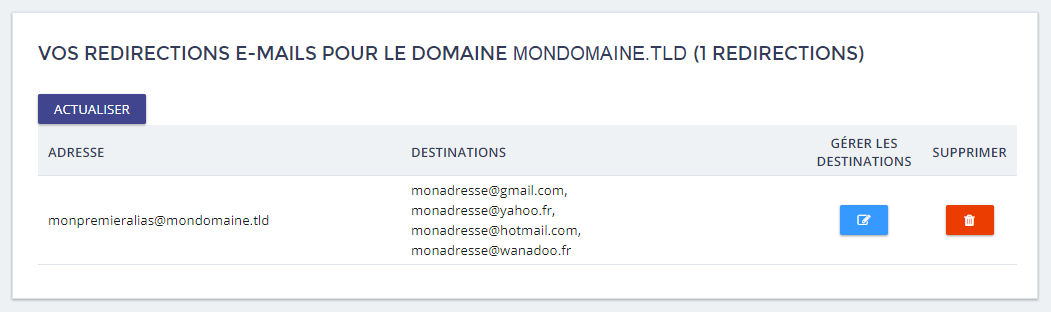
Click on the icon of the column MANAGE DESTINATIONS to add as many addresses to which the alias can forward the emails it receives.
You can delete the destination addresses as you go along.


You will see your Alias displaying all the addresses it redirects to.

Check an e-mail address
Access the webmail by following the steps on this support link.
Setting up an e-mail address
Follow this help link.
Limit of sending and receiving mail
Read the limits for sending and receiving mail on this support link.
In the event of exceeding the quota
A saturated e-mail address cannot receive any more e-mails. It will work again immediately as soon as there is space again once the unwanted e-mails are deleted.
Known problems
Redirects to certain email account providers, such as Gmail, Outlook.com or Orange, are not recommended as redirected emails may be refused due to their anti-spam policy.
In these cases, we recommend that you create a classic mail accountand then to raise it via the solutions proposed by these suppliers: