In this guide, we will look at the different features of a standard shared hosting.
First, go to your trademark control panel, Magic Online or NUXIT.
Standard shared hosting
For a shared hosting START, BOOST, MAX, and NuxitMAX, the client interface allows you to :
- View the technical information of the hosting
- Upgrade to shared hosting
- Manage FTP accounts
- Install a LetsEncrypt SSL certificate
- Make a backup
- Encrypt a password
- Create WebCRON tasks
- Restore a backup
- View traffic and statistics
- View access and error logs
- Attach an existing domain to the hosting
- Add a MYSQL database
- Manage existing MYSQL databases
- Install a CMS
- Choose an application among those proposed by our automatic installation tool:
- Drupal
- Joomla
- Mediawiki
- Moodle
- Owncloud
- PHPBB
- Piwigo
- Prestashop
- WordPress
Please note that some CMS cannot be installed on a shared server because they use a lot of resources, and that others require the intervention of our support to install them.
View technical information
First click on the menu Lodging.


Then go to WEB MANAGEMENT of the accommodation in question.

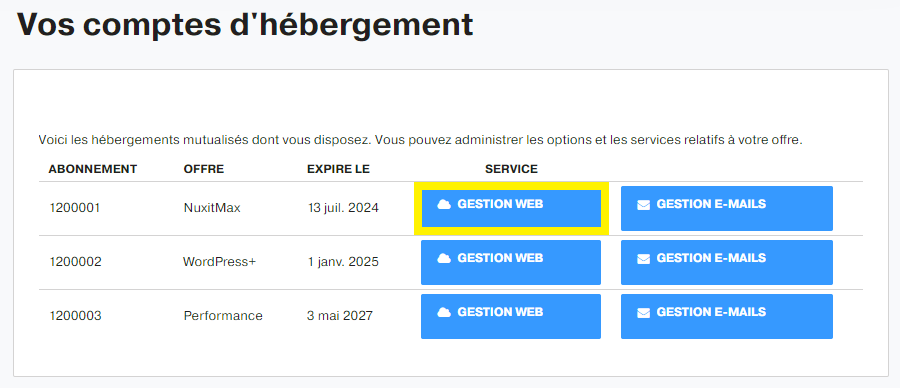
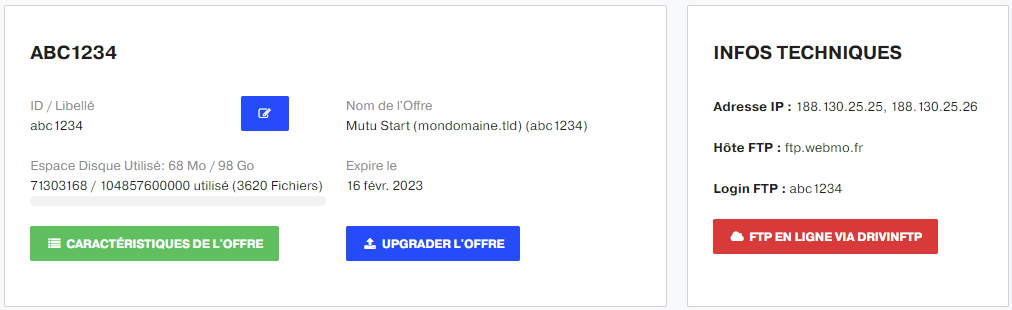
For standard shared hosting, the display shows the following information:
The id of the accommodation
The wording: it can be changed at any time (via the small blue icon)
Disk space
The name of the offer
The expiration date
The characteristics of the offer
The IP address of the server hosting the website(s)
The FTP host
The FTP login
The plugin DRIVINFTP which allows you to view FTP data online

Upgrade my shared hosting
Go to the menu Account of the customer area.


Click Sign In once again. Subscriptionsand choose the subscription to upgrade. The button CHANGE THE PACK FROM SERVICE is displayed.
Make a backup
It is mandatory to have ordered the offer DrivinCloud to create a bakc-up.
This is the support link which explains how the DrivinCloud tool works.
Restore a backup
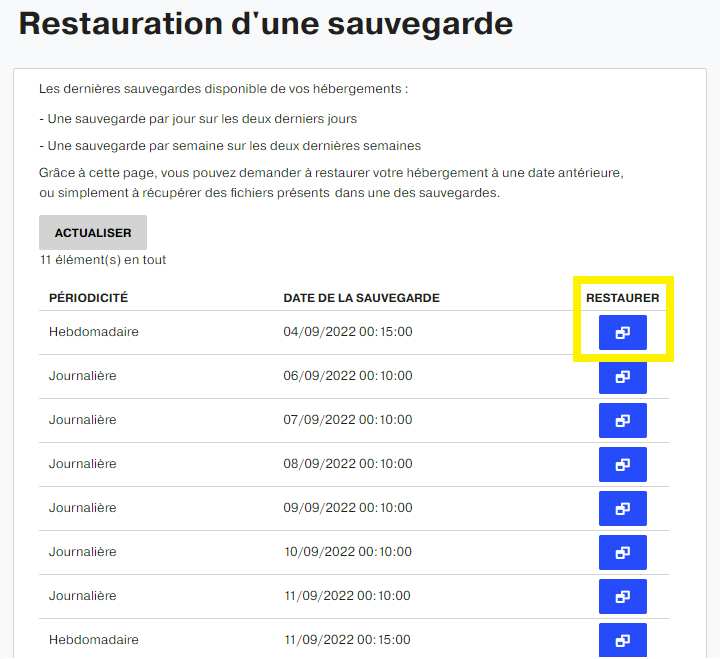
Operation and periodicity
For a shared hostingThe system provides a backup of the last two hours, the last seven days and the last two weeks. A total of 11 backups spread over 15 days.
The most recent backup, of course, overwrites the oldest.
Start the restoration
First click on the menu Lodging.
Then go to WEB MANAGEMENT of the accommodation in question.
Click on the button RESTORE A BACKUP of the section OPTIONS AND GENERAL PARAMETERS.


Finally click on the restore button.
The interface confirms the restoration launch.

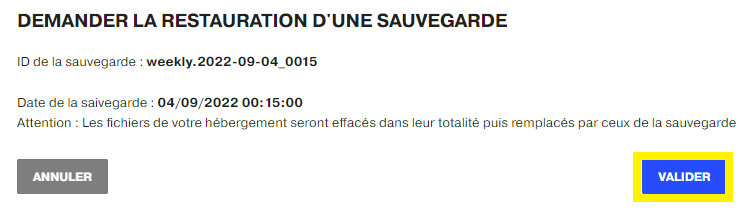
The following message is displayed, and an e-mail is sent to the e-mail address of the customer profile, containing the details of the restoration.

The files of the hosting will be deleted and the action is irreversible.
Access and error logs
Click Sign In once again. Lodging in the left menu.
Follow the button WEB MANAGEMENT of the shared hosting in question.
Then click on the button ACCESS AND ERROR LOGS.

First, you need to choose the domain in question, then download the access logs according to the desired period.


Then there is the error section.


Note that error logs are only created when an error occurs. If the file is not present on the interface, it means that there was no error.