This guide explains how to install an SSL certificate on a given server.
You can only follow these guides if the following conditions are met:
CSR generation on a Plesk server
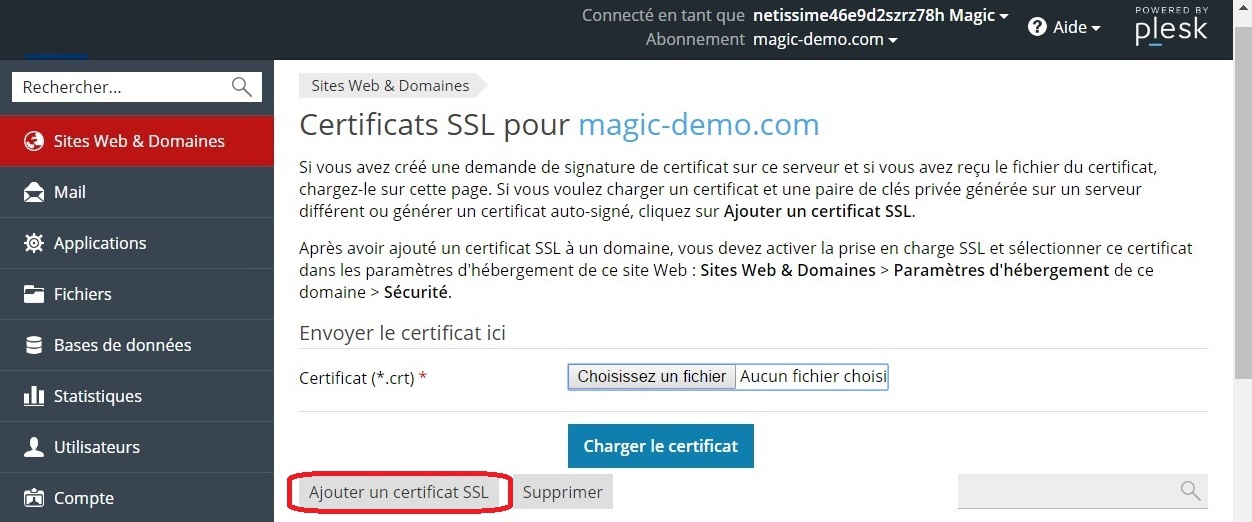
First, go to your customer interface. Click on the subscription in question (whether it's shared hosting, a private server or a dedicated server). Follow the link to go to Plesk and finally click on SSL Certificates.

Then follow the button Add an SSL certificate.
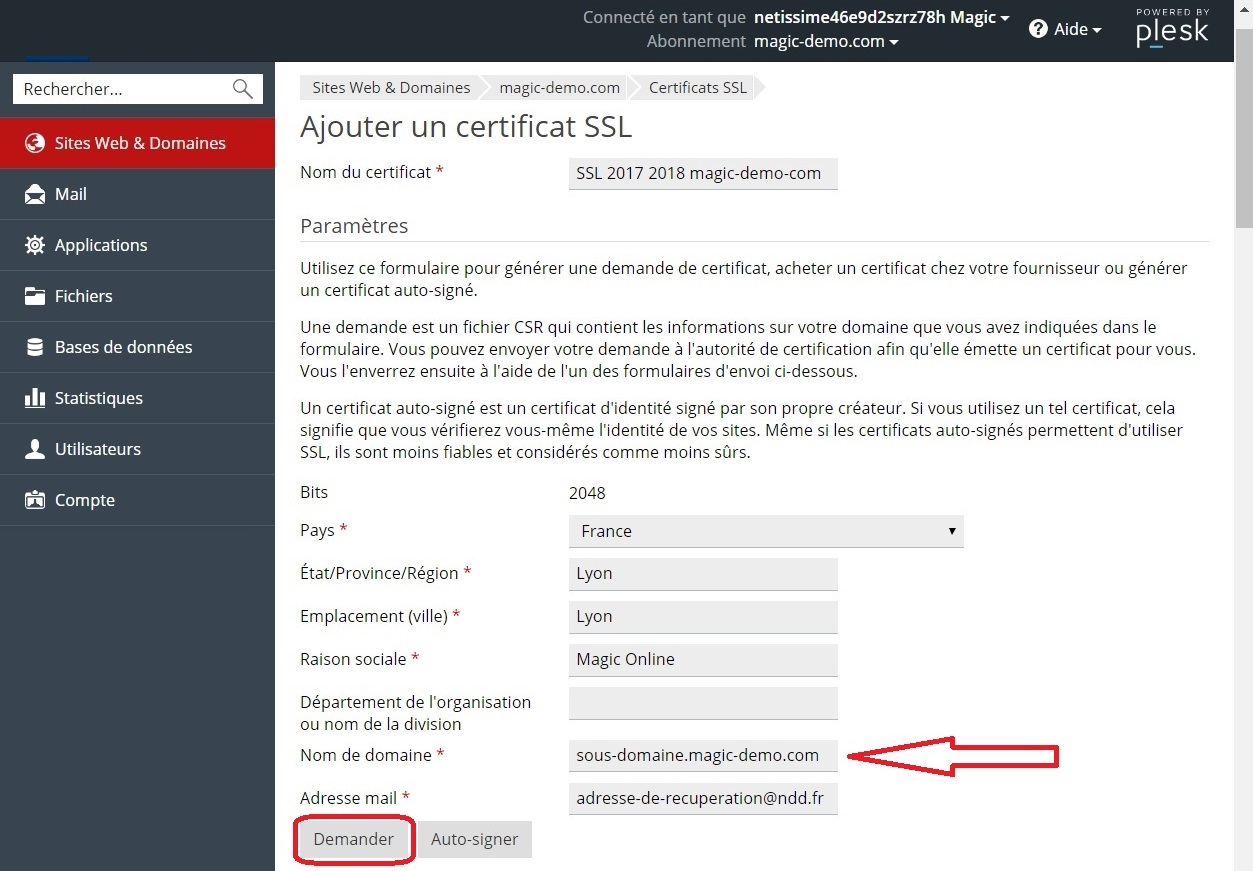
First, enter the name of the certificate in the very first input field. You can enter it in the form SSL 2018 20XX DOMAIN-TLD (the area and the order period).
- If you have ordered a DomainSSL, OrganizationSSL or BUSINESS EV SSL certificate, you only need to put www.votredomaine.tld in the field Domain name.
(Replace www.votredomaine.tld by your domain in particular).
- If you have chosen an OrganizationSSL or BUSINESS EV SSL certificate, be very precise about the data entered in this form, they must be consistent with the whois data of the domain name, which must also be consistent with the data of the company (on the site https://www.infogreffe.fr/ or http://www.societe.com/ ). Put in the same way www.votredomaine.tld in the field Domain name.
(Replace www.votredomaine.tld by your domain in particular).

- If you have purchased a WILDCARD certificate, you must enter this value in the field Domain name : *.yourdomain.tld
(Replace well yourdomain.tld by your domain in particular).

- If the certificate is of type DomainSSL, OrganizationSSL or BUSINESS EV SSL, for a sub-domain, it is enough to put in the field Domain name the sub-domain in question. Example: store.yourdomain.tld
(Replace again store.yourdomain.tld by the right values in particular).
- If on the other hand it is about a certificate OrganizationSSL or BUSINESS EV SSL Be very precise on the data entered in this form, they must be in conformity with the data whois of the domain name, which also must be in conformity with the data of the company (on the site https://www.infogreffe.fr/ or http://www.societe.com/ ). Also put store.yourdomain.tld in the field Domain name.
(Replace with store.yourdomain.tld by your sub-domain.domain in particular).
- If you have placed a WILDCARD certificate for a subdomain, you will need to put this value in the Domain name : *.yoursubdomain.yourdomain.tld
(Replace well yoursubdomain.yourdomain.tld by your sub-domain.domain in particular).

Whatever the type of your order, click on the button Request.
You will finally see the certificate appear.

Recover the CSR
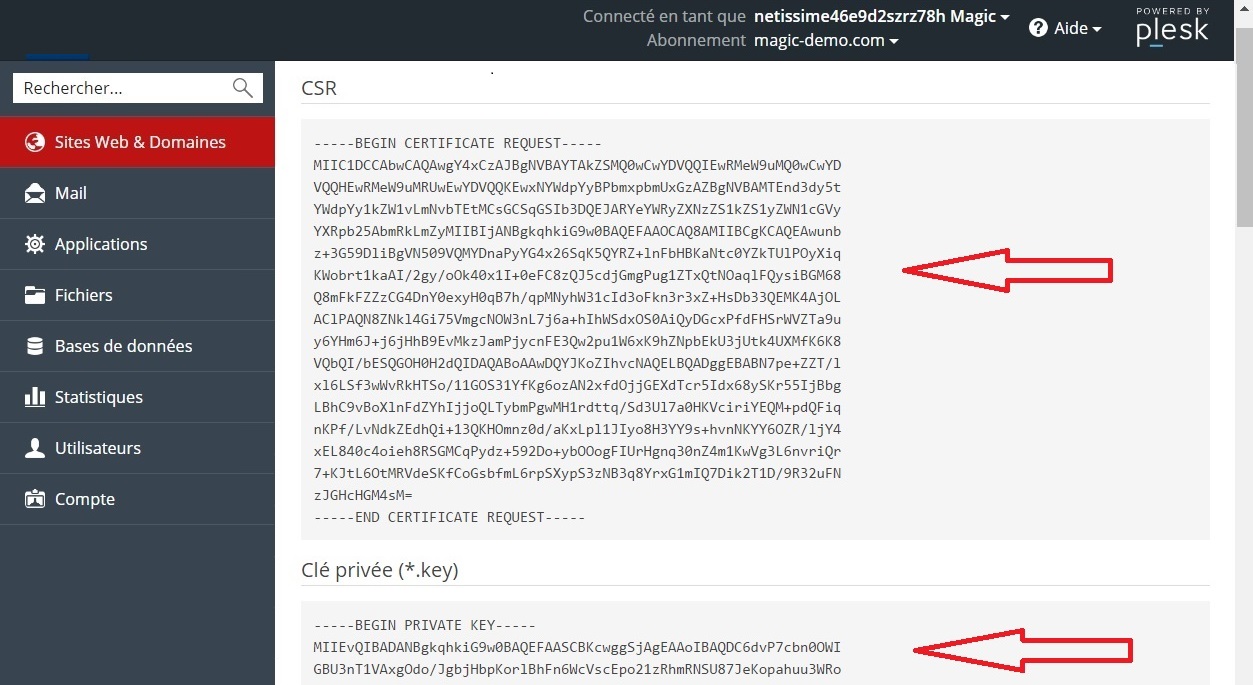
First click on the generated certificate to retrieve the CSR. Then, copy it as you will need it to order the SSL certificate.
Do not lose the CSR/Private Key pair. The private key should not be given to anyone and it should not be used in any online tool, because, as the name suggests, it is private.
Do not proceed to the next step if the CSR is not generated.
CSR generation on an Apache server
The CSR (Certificate Signing Request) and the private key are generated by openssl. First connect to your server with SSH to do this. Then go to a directory where you want to keep the generated files (the /home for example).
Then type the following command in SSH to get the path to the directory you are working in:
pwd
In this example we use the domain www.domainetest.com, please adapt this procedure to your domain name.
1. Generation of the private key
First, type the following command in SSH:
openssl genrsa -out www.domainetest.com.key 2048
The private key is then generated in the file www.domainetest.com.key
2. Generation of the CSR
First, type the following command in SSH:
openssl req -new -key www.domainetest.com.key -out www.domainetest.com.csr
Please fill in the following information first:
[country name] Two-letter country code (FR for France)
[state or province name] Department or region
[locality name] City/Town
[organization name] Organization (your company)
[organization unit name] Service (optional)
[common name] Domain name (with www.)
DO NOT ENTER the following information:
[email address]
[challenge password] Challenge password
[optional company name] Optional company name
The CSR is in the file www.domainetest.com.csr
CSR generation on an IIS server
It is advisable to follow the link of the official page of Microsoft to avoid any anomaly.
The procedure changes depending on the version of IIS itself.
Creation of the validation email address
First of all, you should know that it is not possible to generate an SSL certificate without validating by email the request that will be sent by the SSL certification body.
It is essential to create one of the following email addresses linked to the domain you wish to secure with an SSL certificate:
admin@VOTREDOMAINE
administrator@VOTREDOMAINE
webmaster@VOTREDOMAINE
hostmaster@VOTREDOMAINE
postmaster@VOTREDOMAINE
Also, it is possible to use another email address as long as it is in the whois of your domain name, and that the anonymous whois and the RGPD protection are both disabled on it.
Strictly no other email address can be used at the validation stage if it is not mentioned in the above mentioned list.
To create the mail address, and in case you host the mail service on a plesk serveryou can first follow this help link to create the email address you have chosen among admin, administrator, webmaster, hostmaster and postmaster.
If, on the other hand, your domain's email service is hosted elsewhere, you must ask your provider to create the email address.
Please do not proceed to the next step if you do not create an email.
Ordering an SSL Certificate
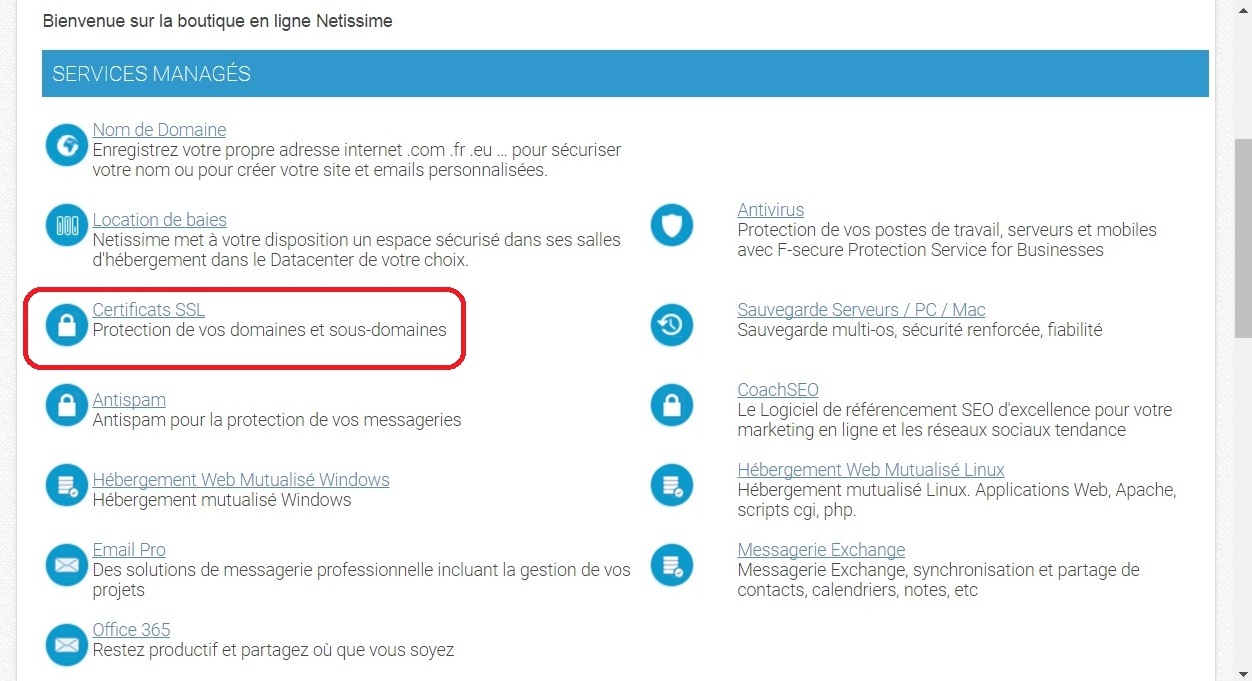
First, access your customer area and click on MARKETPLACE Browse new services.
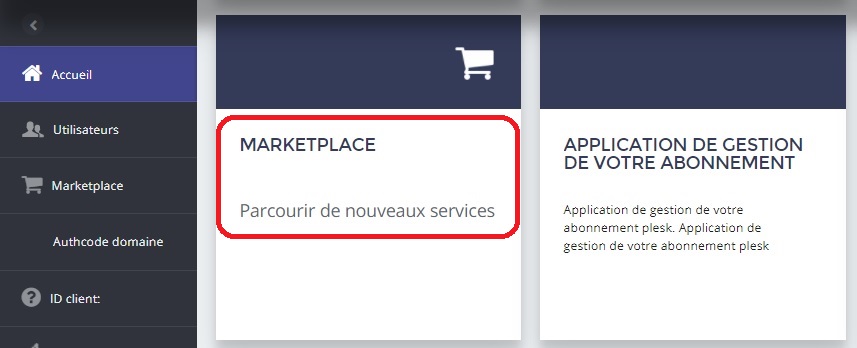
This will take you to the command interface. Click on SSL Certificates.
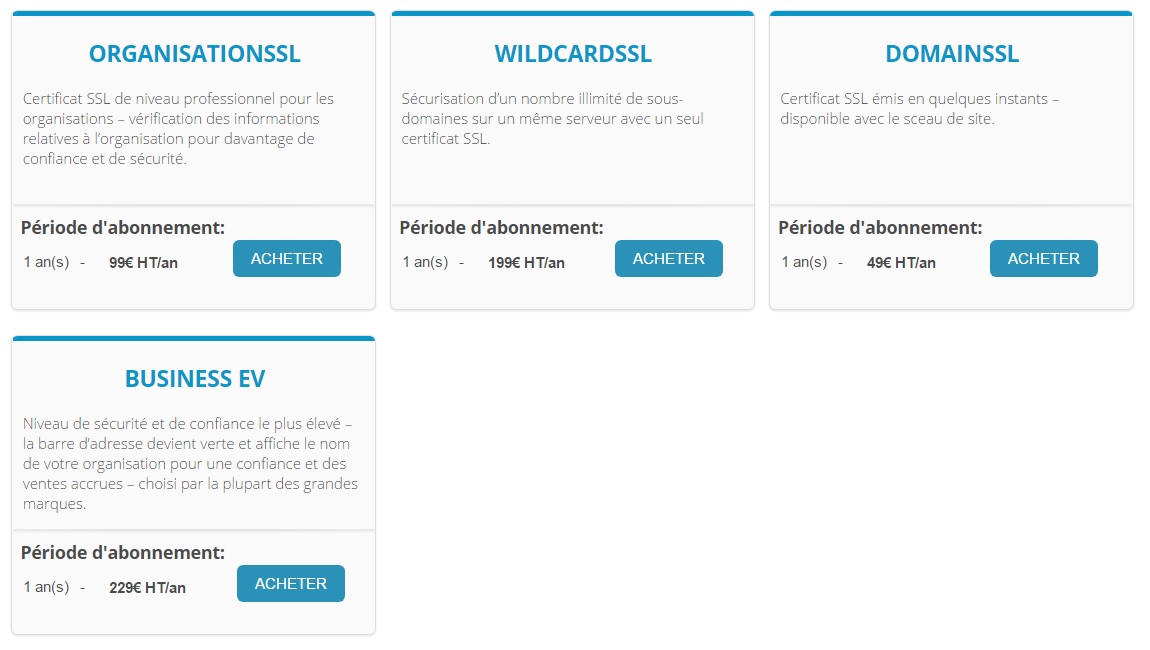
Then choose the certificate that suits you. Here is a little reminder differences between the proposed SSL certificates.
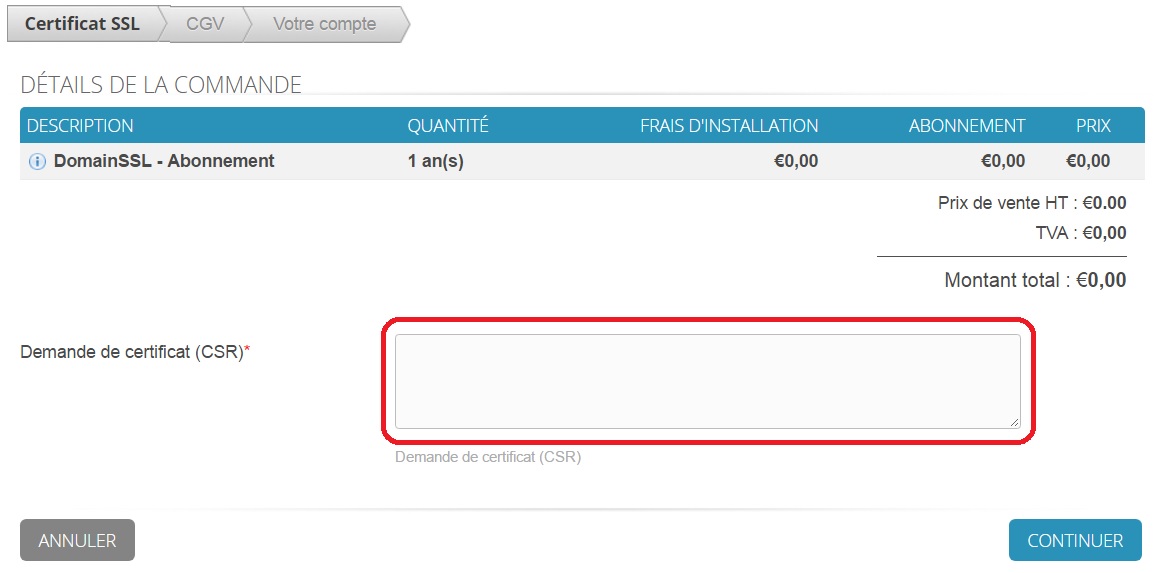
Put in the CSR you retrieved in the first step.
Choose the Web Server Type Plesk.
In this guide we will take as an example the domain magic-demo.com.
The validator's e-mail must be one of the following addresses belonging to the domain (a confirmation email will be sent on it, you must create one of them and put it in the E-mail field of the validator to continue the procedure):
- admin@yourdomain
- webmaster@yourdomain
- administrator@yourdomain
- hostmaster@yourdomain
- postmaster@yourdomain
Job title: You can indicate it in the form SSL-2018-20XX-DOMAINE-tld.
- Replace 20XX_ by the year of expiration
- Replace DOMAIN-tld by your domain-extension (.com .fr .net ..etc).
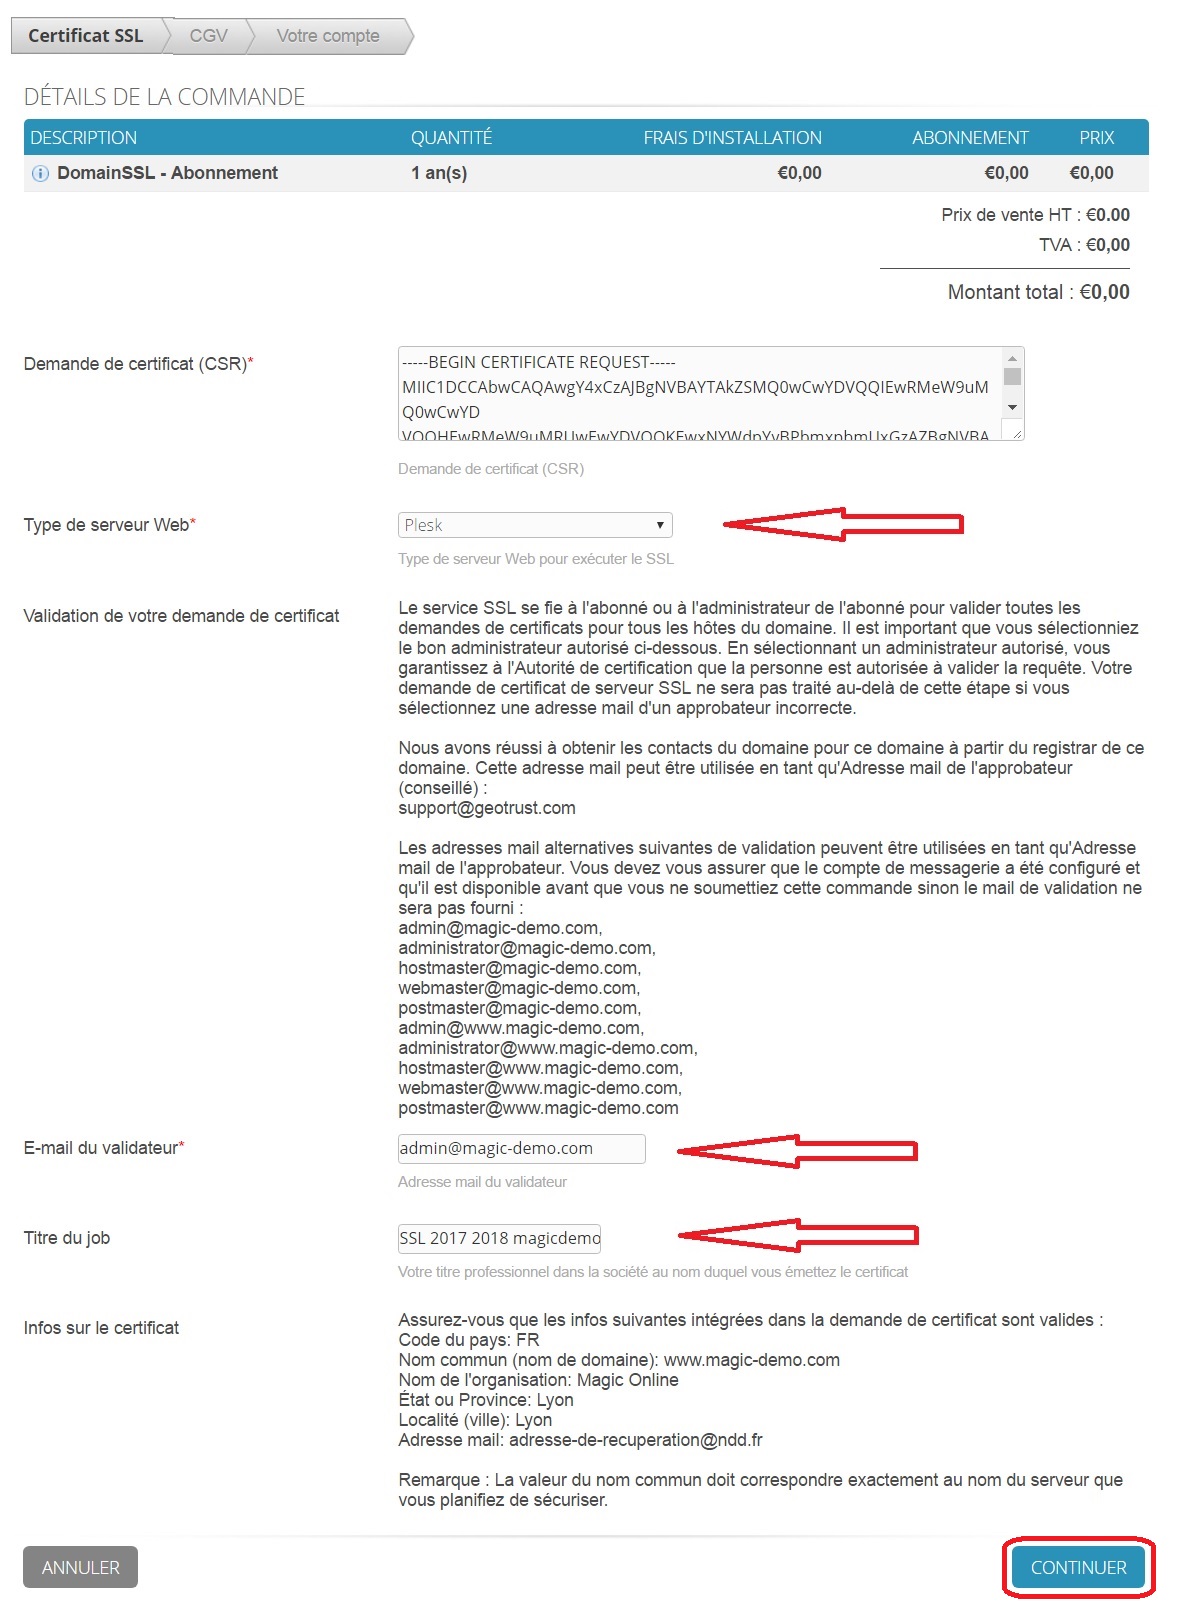
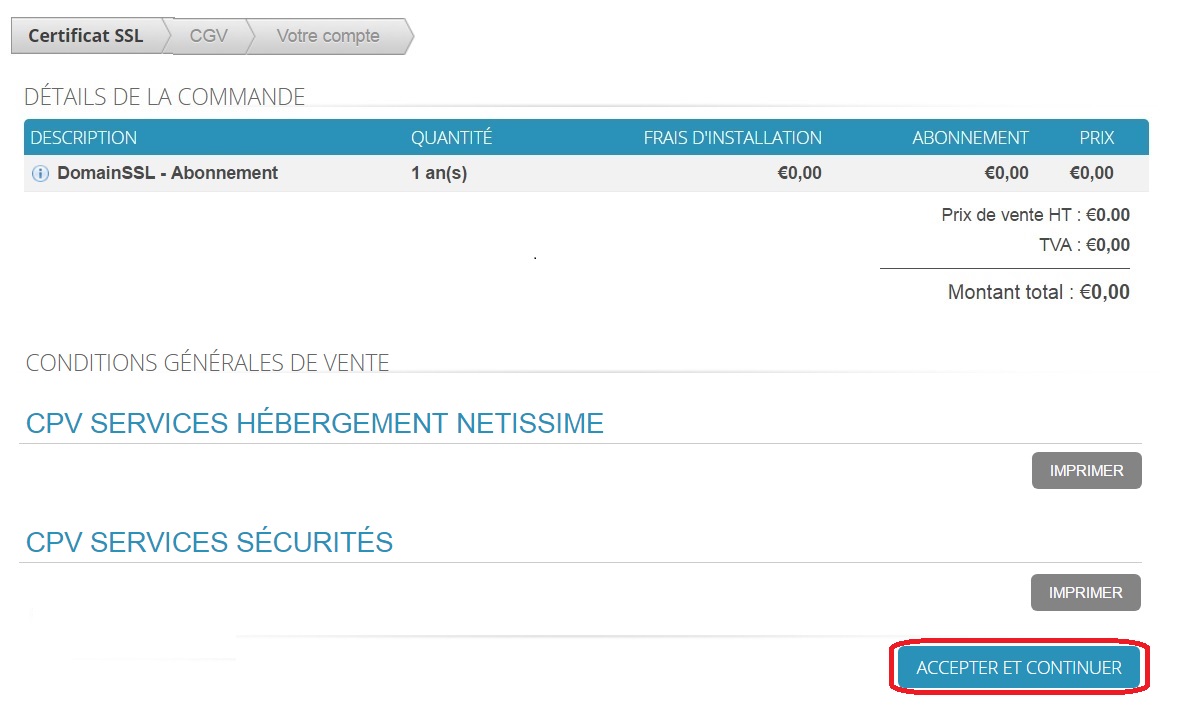
Read the general conditions of sale carefully and then click on the button Accept and continue.
You still have one box to check in order to place the order.
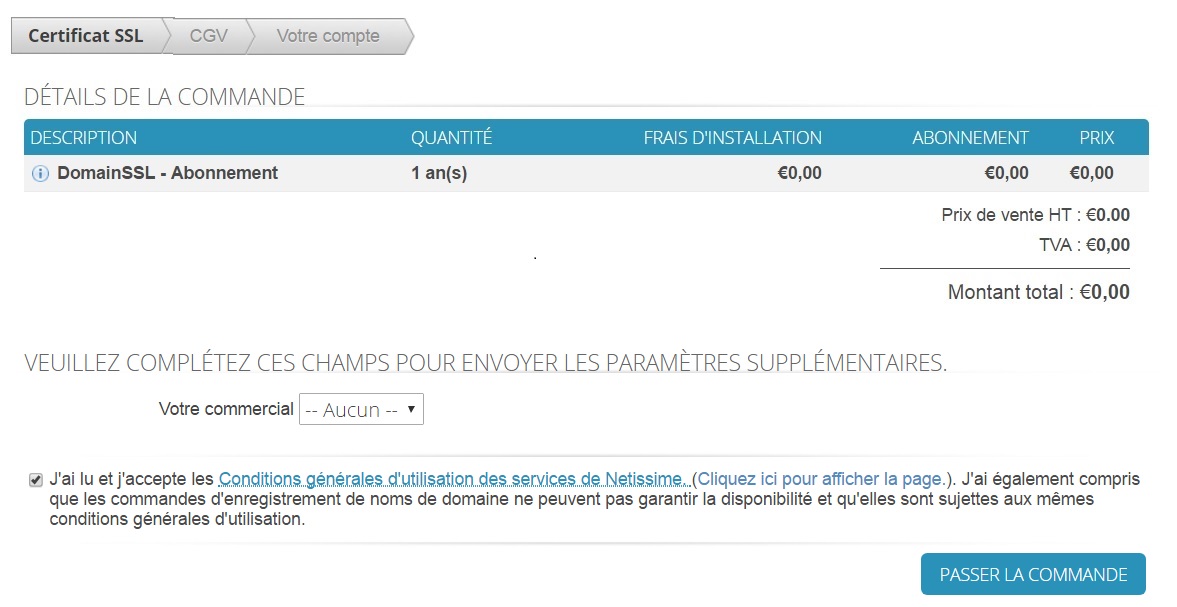
Your order has been placed.

Do not proceed to the next step if the order is not paid.
Validation by email
If your domain's mail service is hosted elsewhere, just check the mail address.
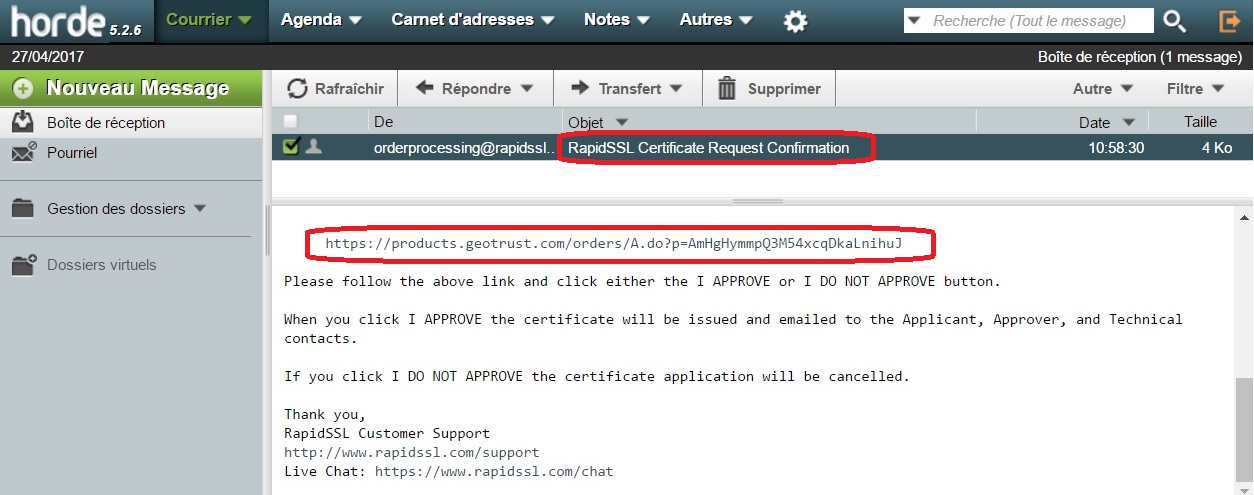
If the mail service is hosted by us, access your webmail interface or your mail software.
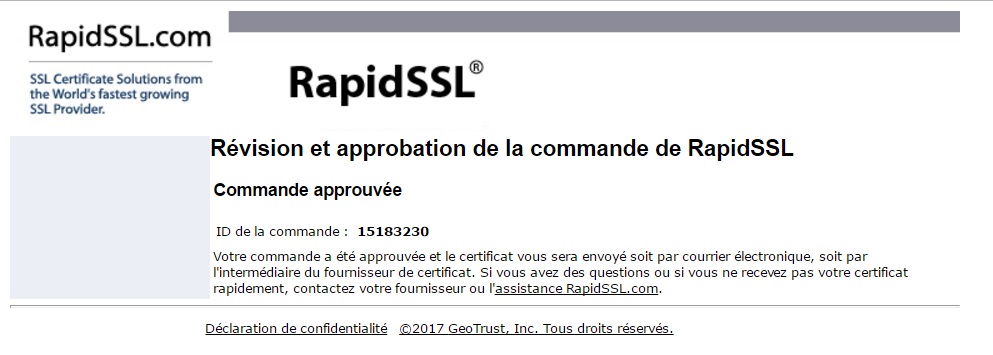
Once inside, you will see an email sent from RapidSSL which contains a link. Follow this link.
You will be presented with an interface that details a little more about the order placed. Read the information carefully before approving.
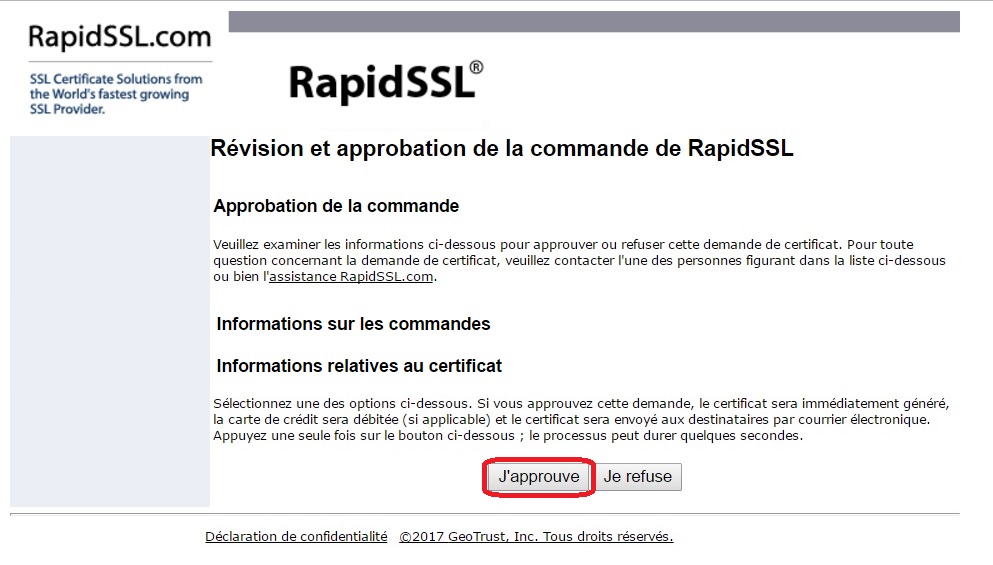
The request being approved, you just have to wait about thirty minutes to receive the keys of the certificate by email on the address you have put
Please do not proceed to the next step if you do not create an email.
Installing SSL keys on a Plesk server
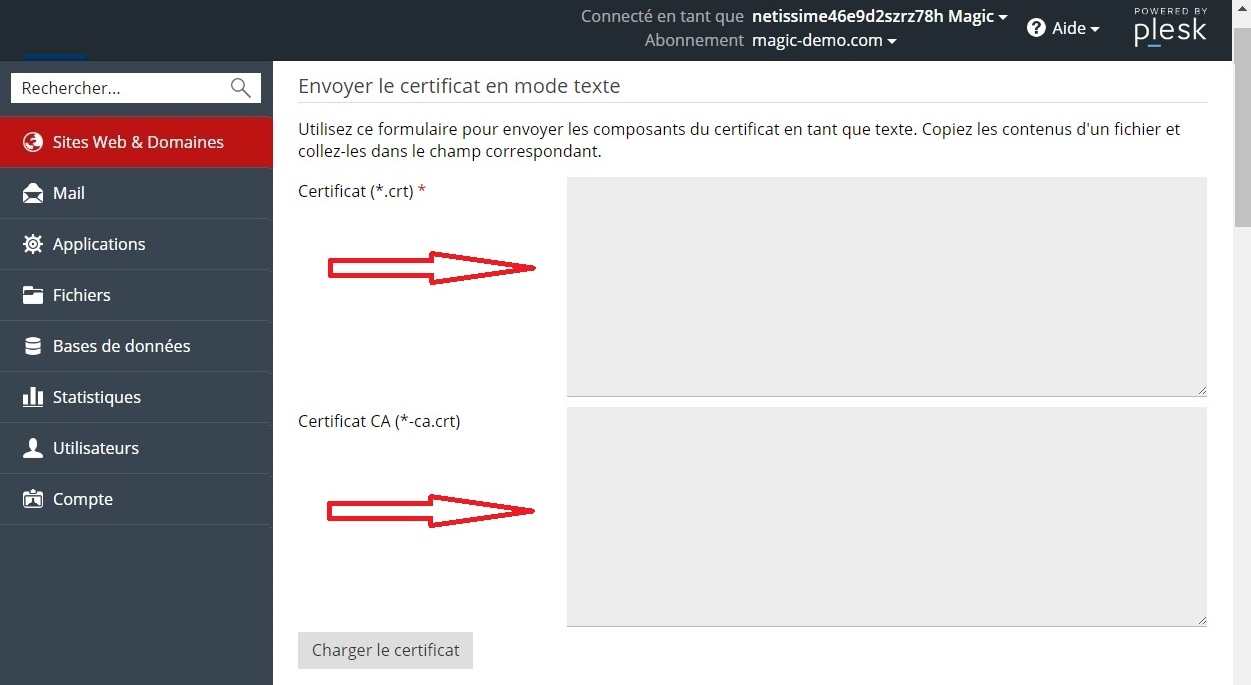
As soon as you receive these keys by email, you will have to come back to the Plesk space to :
- Insert the certificate in the *.CRT field.
- Insert the intermediate certificates in the *-CA.CRT field.
For this, the following two steps must be applied:
- Go to the Plesk space.
- Click on SSL Certificates of the subscription in question.
- Follow the button Add an SSL certificate.
- Click on the SSL in place.
- Copy the certificate key into the Certificate (*.crt) field.
- Copy ALL the keys you will find in the following three files, and put them all in the Certificate field (*.ca.crt) with a line break between each key and the one following it:
- AffTrustExternalCARoot
- COMODORSAAddTrustCA
- COMODORSADomainValidationSecureServerCA
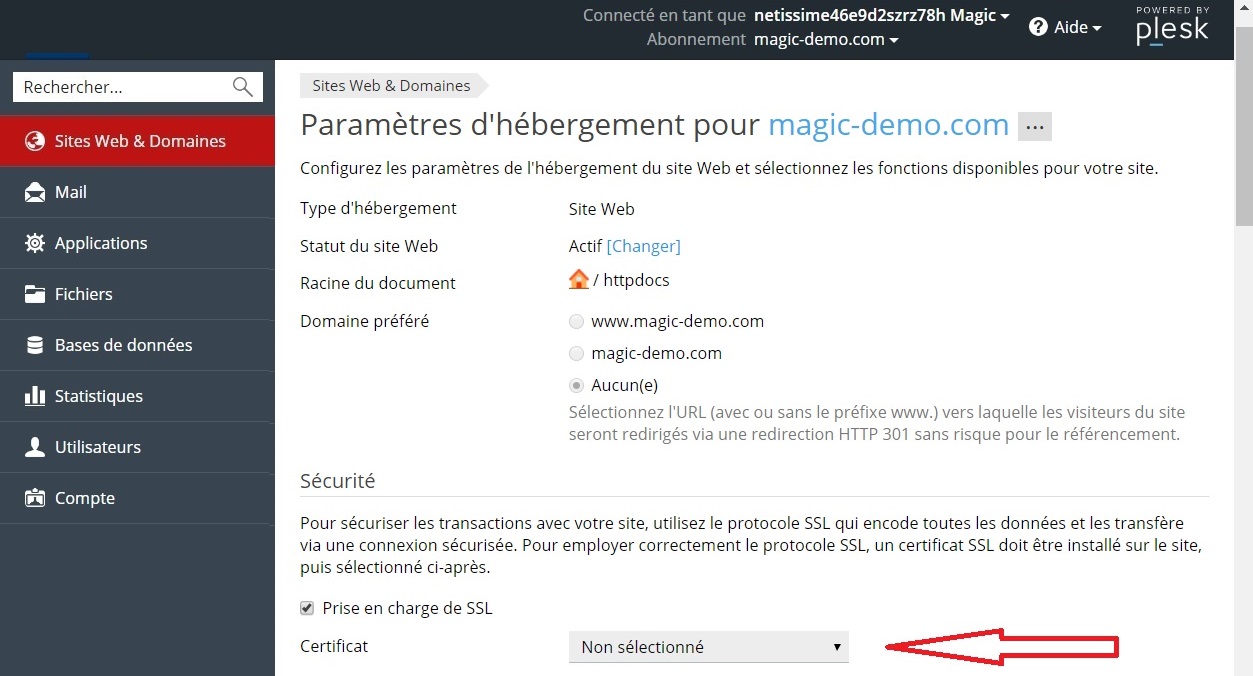
Go back to the Hosting settings.
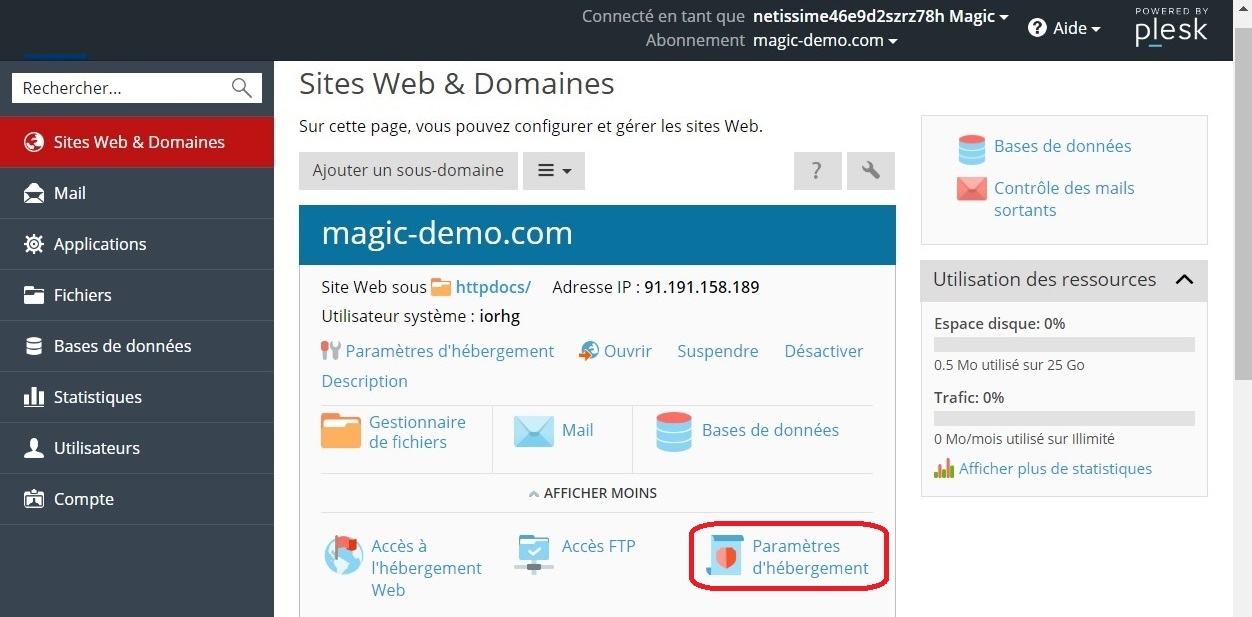
Finally, check the box SSL support and select your certificate.
Your site should now display with https. Remember to change your browser to avoid cache problems.
You can verify the correct installation of the certificate through many online tools such as the https://www.sslshopper.com/ssl-checker.html
You want HTTP://yourdomain.tld/ automatically switches to HTTPS://yourdomain.tld/ ?
Just add the following lines in the .htaccess file under the httpdocs directory:
RewriteEngine On
RewriteCond %{HTTPS} off
RewriteRule (.*) https://%{HTTP_HOST}%{REQUEST_URI}
Warning:
If the .htaccess already contains redirects, you will have to contact your webmaster to make the necessary verifications and avoid the problems of redirection balls that can occur following this addition.
Note:
Once your SSL certificate is installed, you can ensure that it is valid, reliable and error-free by using the sslshopper or any other tool of your choice.
Installation of SSL keys on an Apache server
First of all, connect to your LINUX server with ssh.
Put yourself in a directory where you want to keep your certificates.
Then create a file named domain.pem (replace domain by your domain name in the file name).
Copy the CRT certificate that you received by email via a text editor.
Create a file intermediary.pem and copy in ALL the keys that you will find in the following three files:
- AffTrustExternalCARoot
- COMODORSAAddTrustCA
- COMODORSADomainValidationSecureServerCA
Create a file domain.key (replace domain by your domain name in the file name) and copy the private key into it.
Edit your file httpd.conf and go to the section of the virtual host you want to secure. Your virtual host section should contain the following items:
- Certification Chain File (SSLCertificateChainFile); Must refer to appropriate intermediate root certificates.
- SSL certificate file (SSLCertificateFile); Must refer to the final certificate (.pem or .crt).
- SSL Certificate Key File (SSLCertificateKeyFile); Must refer to the private key file associated with your certificate.
Restart Apache.
Your site must therefore be displayed with https. Think of changing your browser to avoid cache problems.
You would like HTTP://yourdomain.tld/ automatically switches to HTTPS://yourdomain.tld/ ?
Just add the following lines in the .htaccess file under the httpdocs directory:
RewriteEngine On
RewriteCond %{HTTPS} off
RewriteRule (.*) https://%{HTTP_HOST}%{REQUEST_URI}
Installation of SSL keys on an IIS server
Please follow the link on the official Microsoft page to avoid any anomaly.
However, the procedure changes depending on the version of IIS itself.
You can also follow the steps mentioned on this link.